Becoming a grilling pro is a great skill for any home cook. The secret to a great grilled steak? Start by picking the right cut of meat and the right grill. Plus, the way you serve your steak makes a big difference, turning simple steak recipes into unforgettable meals. Here’s everything you need to know for how to grill a steak at home.
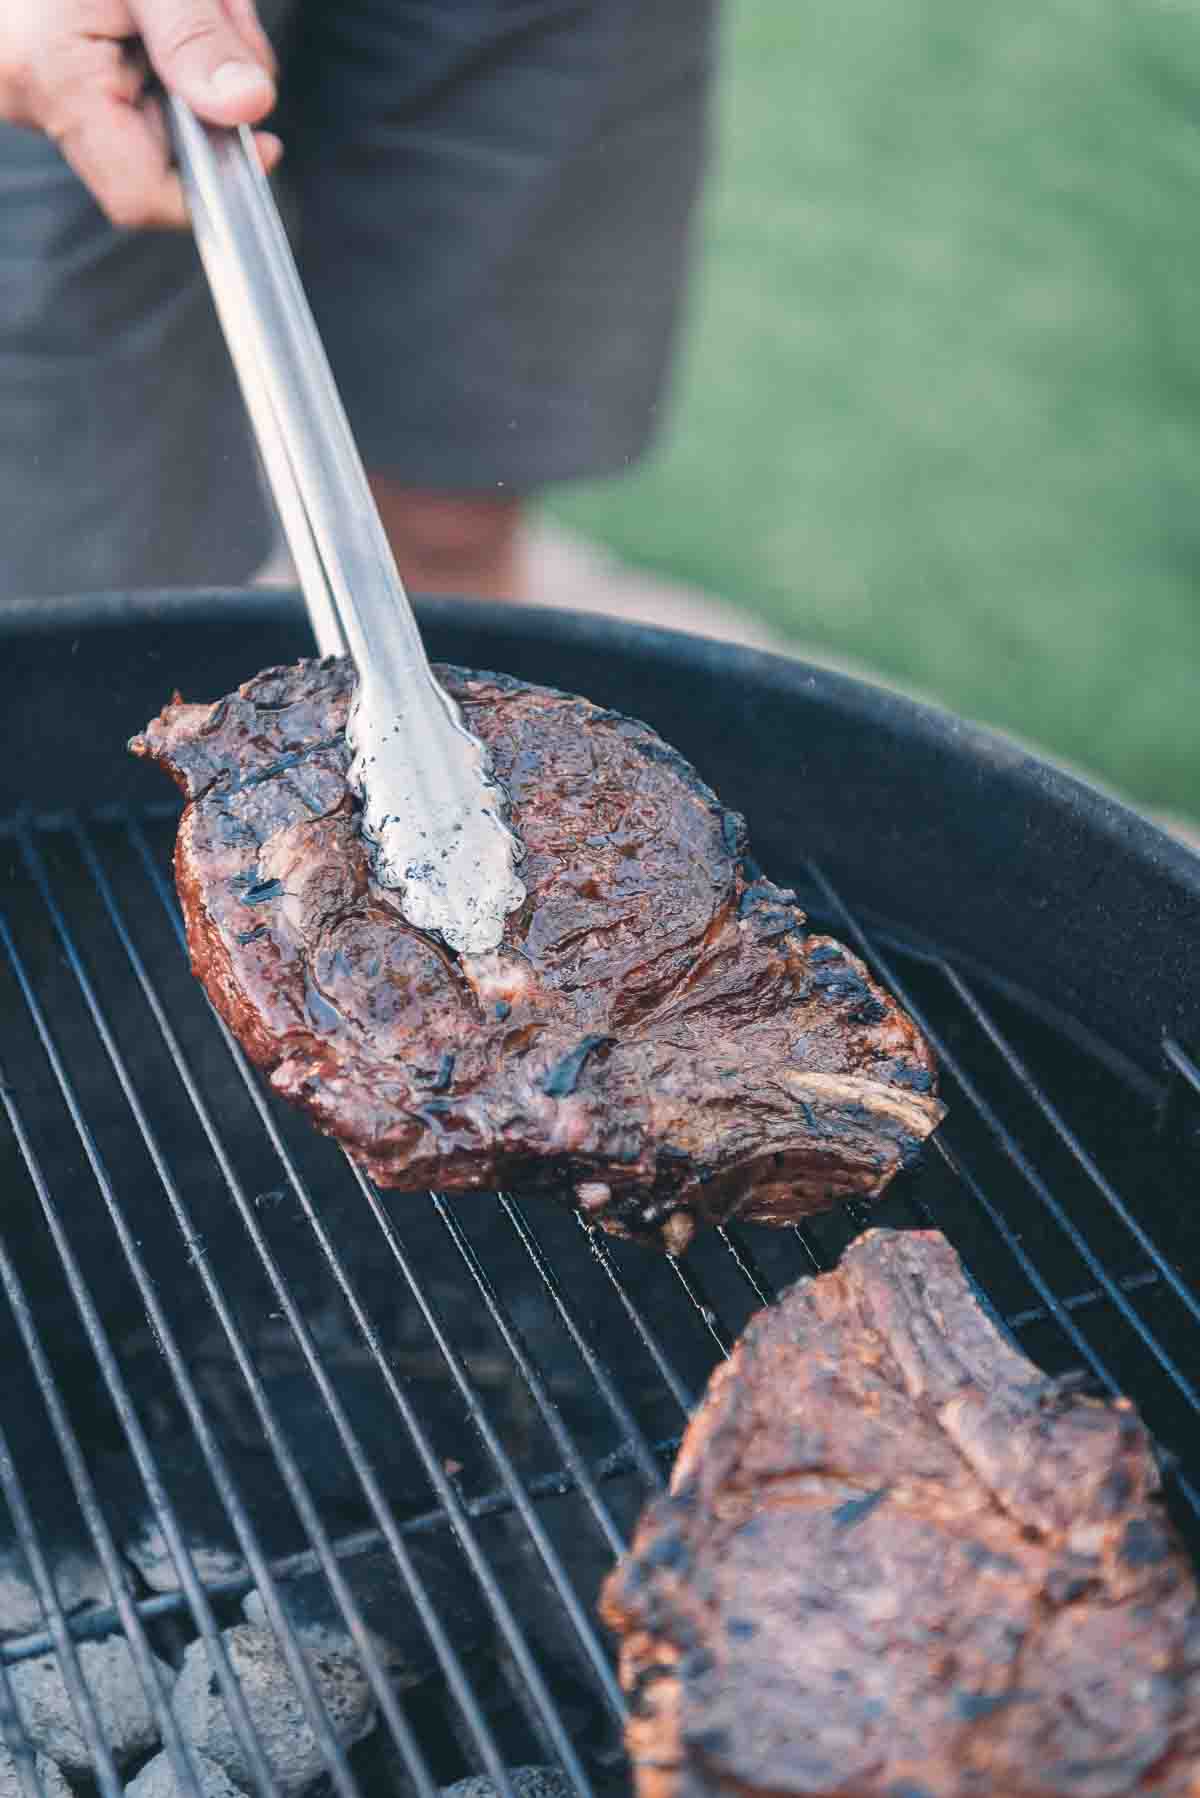
Table of Contents
- TL;DR QUICK TIPS FOR HOW TO GRILL A STEAK
- Start by Choosing the Perfect Cut of Steak
- Factors to Consider When Choosing High-Quality Meat
- Preparing the Steak
- Preparing the Grill
- Grilling the Steak
- Properly Positioning the Steak on the Grill
- Flipping and Basting for Enhanced Flavor
- Tips for Achieving Your Desired Steak Temperature
- The best grilled Steak Recipes
- Advanced Tips
- Checking for Doneness
- Serving and Enhancing the Steak
- Tips for Slicing and Plating the Steak
- Enhancing the Flavor with Sauces and Toppings
- Side Dishes and Beverages
- Troubleshooting and Common Mistakes
- More helpful grilling guides
- How to Grill a Steak on a Charcoal Grill Recipe
Grilling the perfect steak begins with choosing the right cut that tastes great on a grill. Combine that with the best advice on seasoning, and controlling the temperature to get your steak just right, you’ll enjoy a delicious, char-kissed flavor in every bite.
This guide to grilling steaks covers choosing great cuts of quality beef, utilizing top flavoring techniques, mastering temperature and doneness, and letting it rest for tender, caramelized, juicy results.
TL;DR QUICK TIPS FOR HOW TO GRILL A STEAK
- Choose the right cut. Opt for well-marbled steaks like ribeye for maximum flavor and juiciness. Go for cheaper or leaner cuts if on a budget.
- Prepare the grill and steak properly. Allow steak to come to room temp. Preheat the grill completely. Use direct heat for thinner steaks and indirect for thicker.
- Check for doneness based on temperature and visual cues. 120°F for rare, 130°F for medium rare, etc. Let the steak rest after cooking.
- Enhance flavor. Slice against the grain for tenderness. Top with compound butter or sauces. Pair with complementary sides. Avoid common mistakes like uneven grill temps.
Start by Choosing the Perfect Cut of Steak
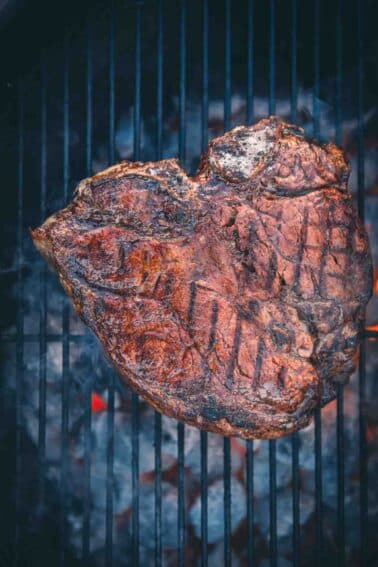
Choosing the perfect type of steak for grilling is the first step you must master before grilling. Some of the best steaks for grilling are ribeyes, New York strip steaks, filet mignon, T-bone steak, and porterhouse steak. These steak cuts have a decent fat content, lending to a tender cut of beef when grilled.
However, some may have a little too much fat for some people. Instead, opt for leaner cuts of steak like sirloin steak and top round roast, which yield tons of beefy flavor without all the fat.
If you’re trying to cut back on your food budget, no worries. There are tons of cheap cuts of steak for grilling that don’t cost an arm and a leg but are still delicious when prepared on the grill. These types of steak are perfect for those who cook steak regularly and don’t want to break the bank.
When you’ve finally picked out your perfect steak for grilling, the next step is to head to the grocery store. However, buying steak at the grocery store can be overwhelming, especially with all the different cuts and beef labels. One way we like to simplify the meat buying process it to buy meat online. This way, you know exactly what you’re getting and can filter for your preferences.
Our favorite steak cuts for grilling are
Factors to Consider When Choosing High-Quality Meat
When you’re gearing up to grill the perfect steak, selecting the right cut is key. Understanding grades of beef can help you find the best bang for your buck.
- Look for steaks with good marbling – those streaks of fat throughout the meat that melt during cooking, adding juiciness and flavor.
- Thickness matters, too; aim for steaks that are at least one inch thick to ensure a nice, juicy center.
- And, of course, freshness is non-negotiable. Opt for meat that’s bright red, firm to the touch, and has no off-putting odor.
- Knowing the USDA meat grades can also be helpful when picking a cut of beef.
Preparing the Steak
Defrosting and Marinating the Steak
Before grilling, it’s important to defrost your steak to room temperature. Allowing your steak to come to room temperature allows the steak to cook evenly once placed on the grill.
To defrost quickly:
- Place your steak in a plastic bag in a bowl full of cold water.
- Leave it in the fridge for up to 24 hours, allowing the steak to completely defrost.
You can also leave your steak in its original packaging and place it in the fridge without the water for at least 24 hours or longer, depending on the thickness of the steak.
Marinating Steak
A marinade is a liquid mixture of ingredients, typically acidic and flavorful, used to soak meat before cooking. Its primary purpose is to enhance the flavor, tenderness, and juiciness of the meat, but it’s only really needed on tougher cuts of meat and we don’t use one every time we grill a steak.
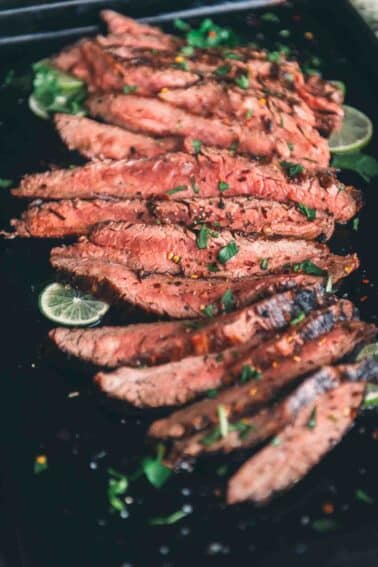
We like to use our flank steak marinade and all-purpose steak marinade to add flavor and moisture to our steaks.
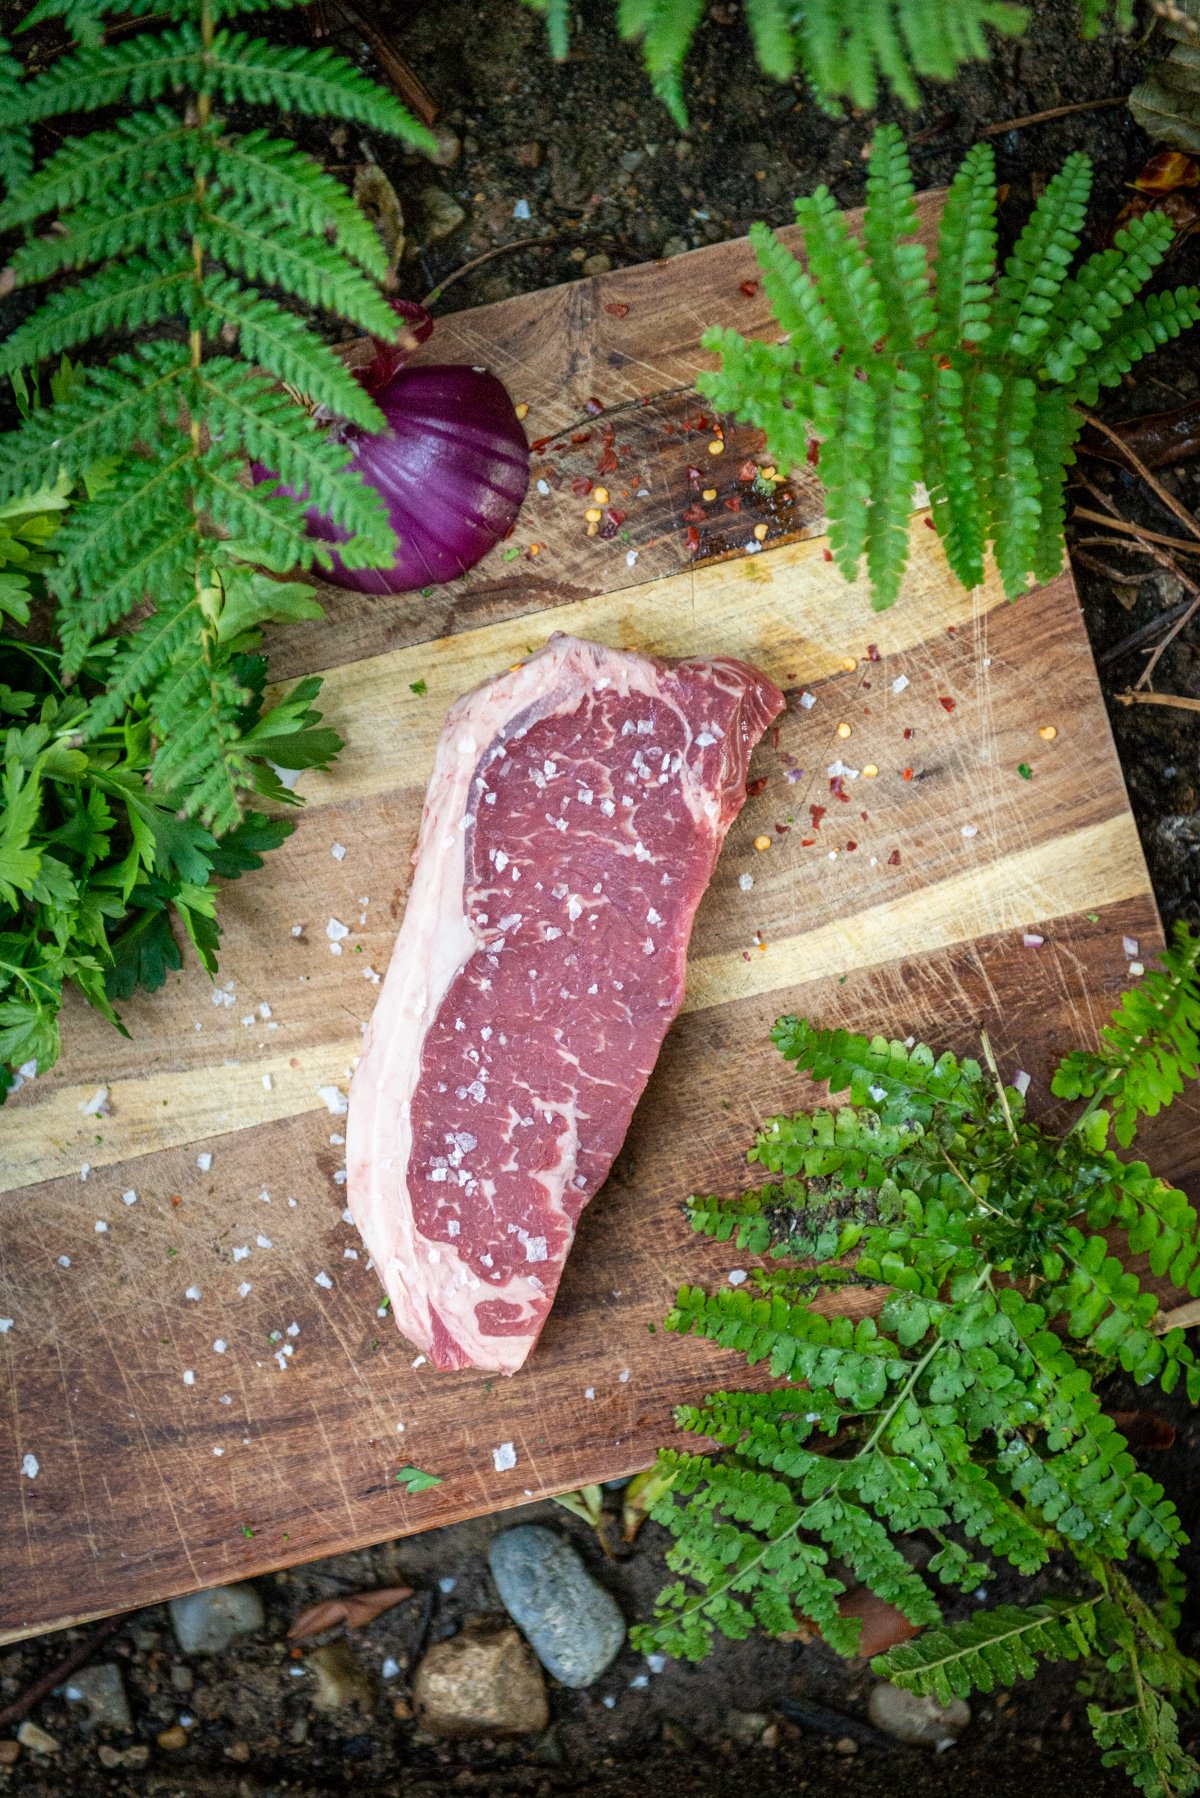
Seasoning Options
While salt and pepper are great options for seasoning a steak, there are a few other ways to add flavor to steak before the grilling process. For example, using dry rubs can enhance the steak’s flavor. One of our favorite dry rubs is our Ooomami Spice Blend.
For the best results, liberally season your steak with salt 24 hours before grilling it. Leave it in the fridge to dry brine for an amazing result.
Preparing the Grill
When it comes to grilling steak, you want to use a grill that suits your needs and preferences. Here are some of the best grills we recommend for all your recipes:
Charcoal Grill
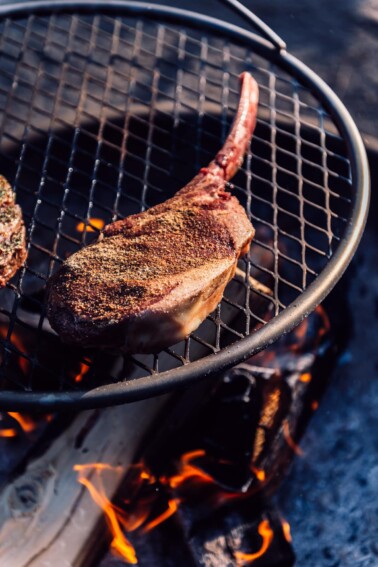
Using a charcoal grill to cook your steak is a perfect option for those who want a flame-kissed flavor. This type of grill is great because you can smoke with wood chips to get that luscious, smoky flavor. If you’ve never tried smoking wood before, starting off with a steak is perfect, as it’s a quick smoking process.
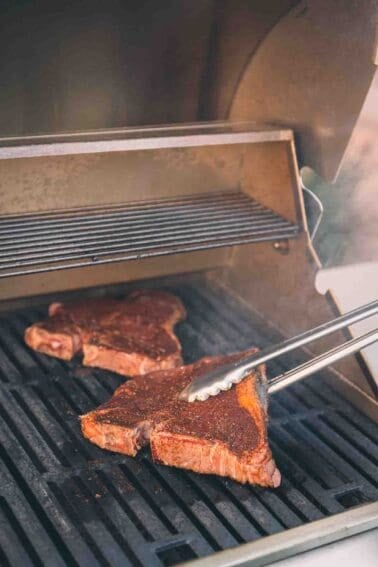
Gas Grill
Grilling a steak on a gas grill is your classic go-to option for cooking a steak. Gas grills are perfect for cooking steaks as they have great temperature control, making them perfect for weeknight dinners when you need to whip up a quick meal. Another great way to use a gas grill to cook a steak is smoking with wood chips on a gas grill. Adding wood chips to the grilling process provides a little smoke flavor to the meat, leveling up the final result.
Preheating and Maintaining the Grill Temperature
Maintaining heat on a gas grill is a bit easier than a charcoal grill, especially if you’re a beginner. For a gas grill, all you need to do is turn the burners to the highest setting and let it preheat for 15 minutes.
If you want to add wood chips, add those after you ignite your burners. Add the wood chips to a smoker box and let them infuse that smoky goodness into the grill. We recommend using Western Wood Chips or Jack Daniel’s Wood Chips.
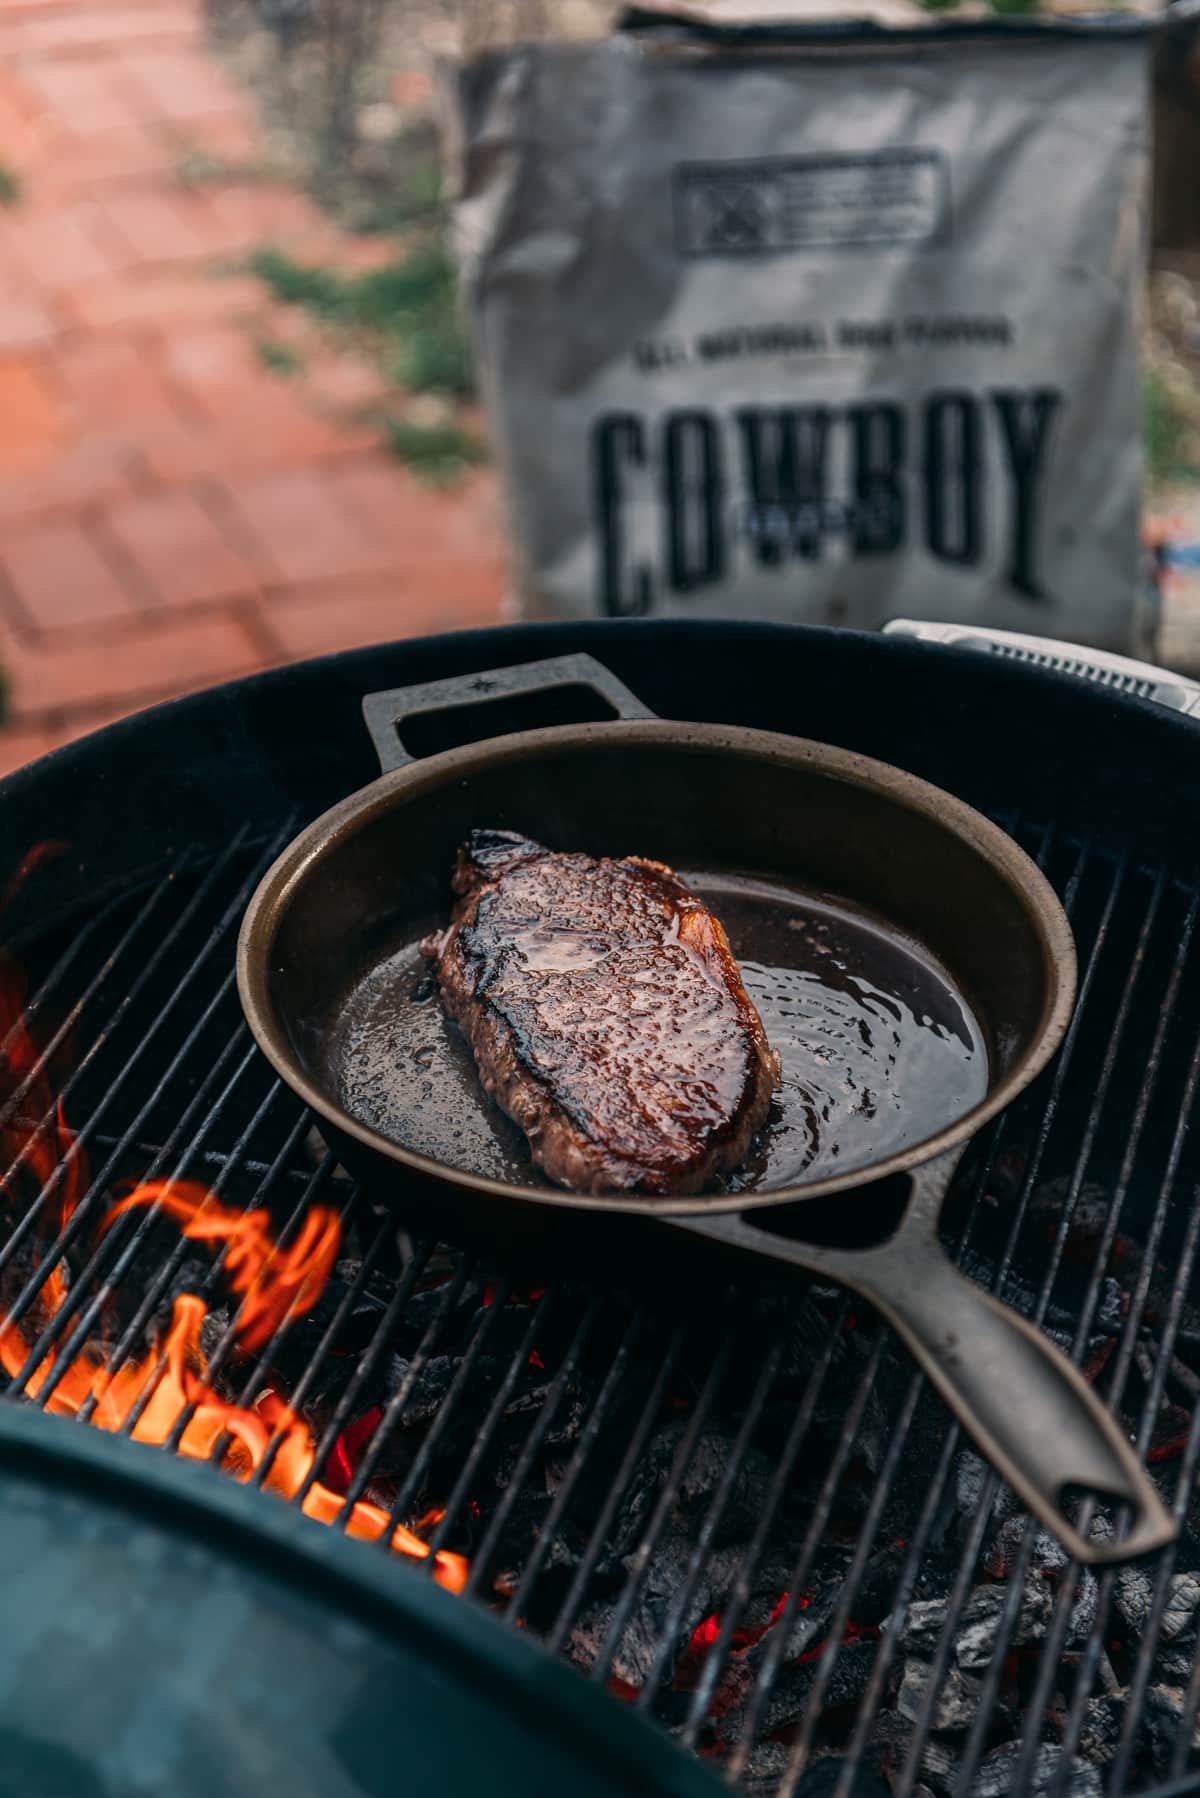
As for the charcoal grill, light the charcoal using a charcoal chimney and let it burn for 15 minutes until its 70% ashed over. Then add the coals on one side of your grill, building a 2-zone fire for a cool side and a hot side.
We love using Cowboy Lump Charcoal for our charcoal grills.
Cleaning Your Grill
After you’re done cooking your steak, it’s important to understand how to clean a grill to keep it running smoothly and looking squeaky clean. We recommend oiling the grill grates with canola oil or vegetable oil before and after use to prevent sticking and seasoning the grill.
Making this a part of your grilling routine will help you get better results and maintain the life of your grill.
Grilling the Steak
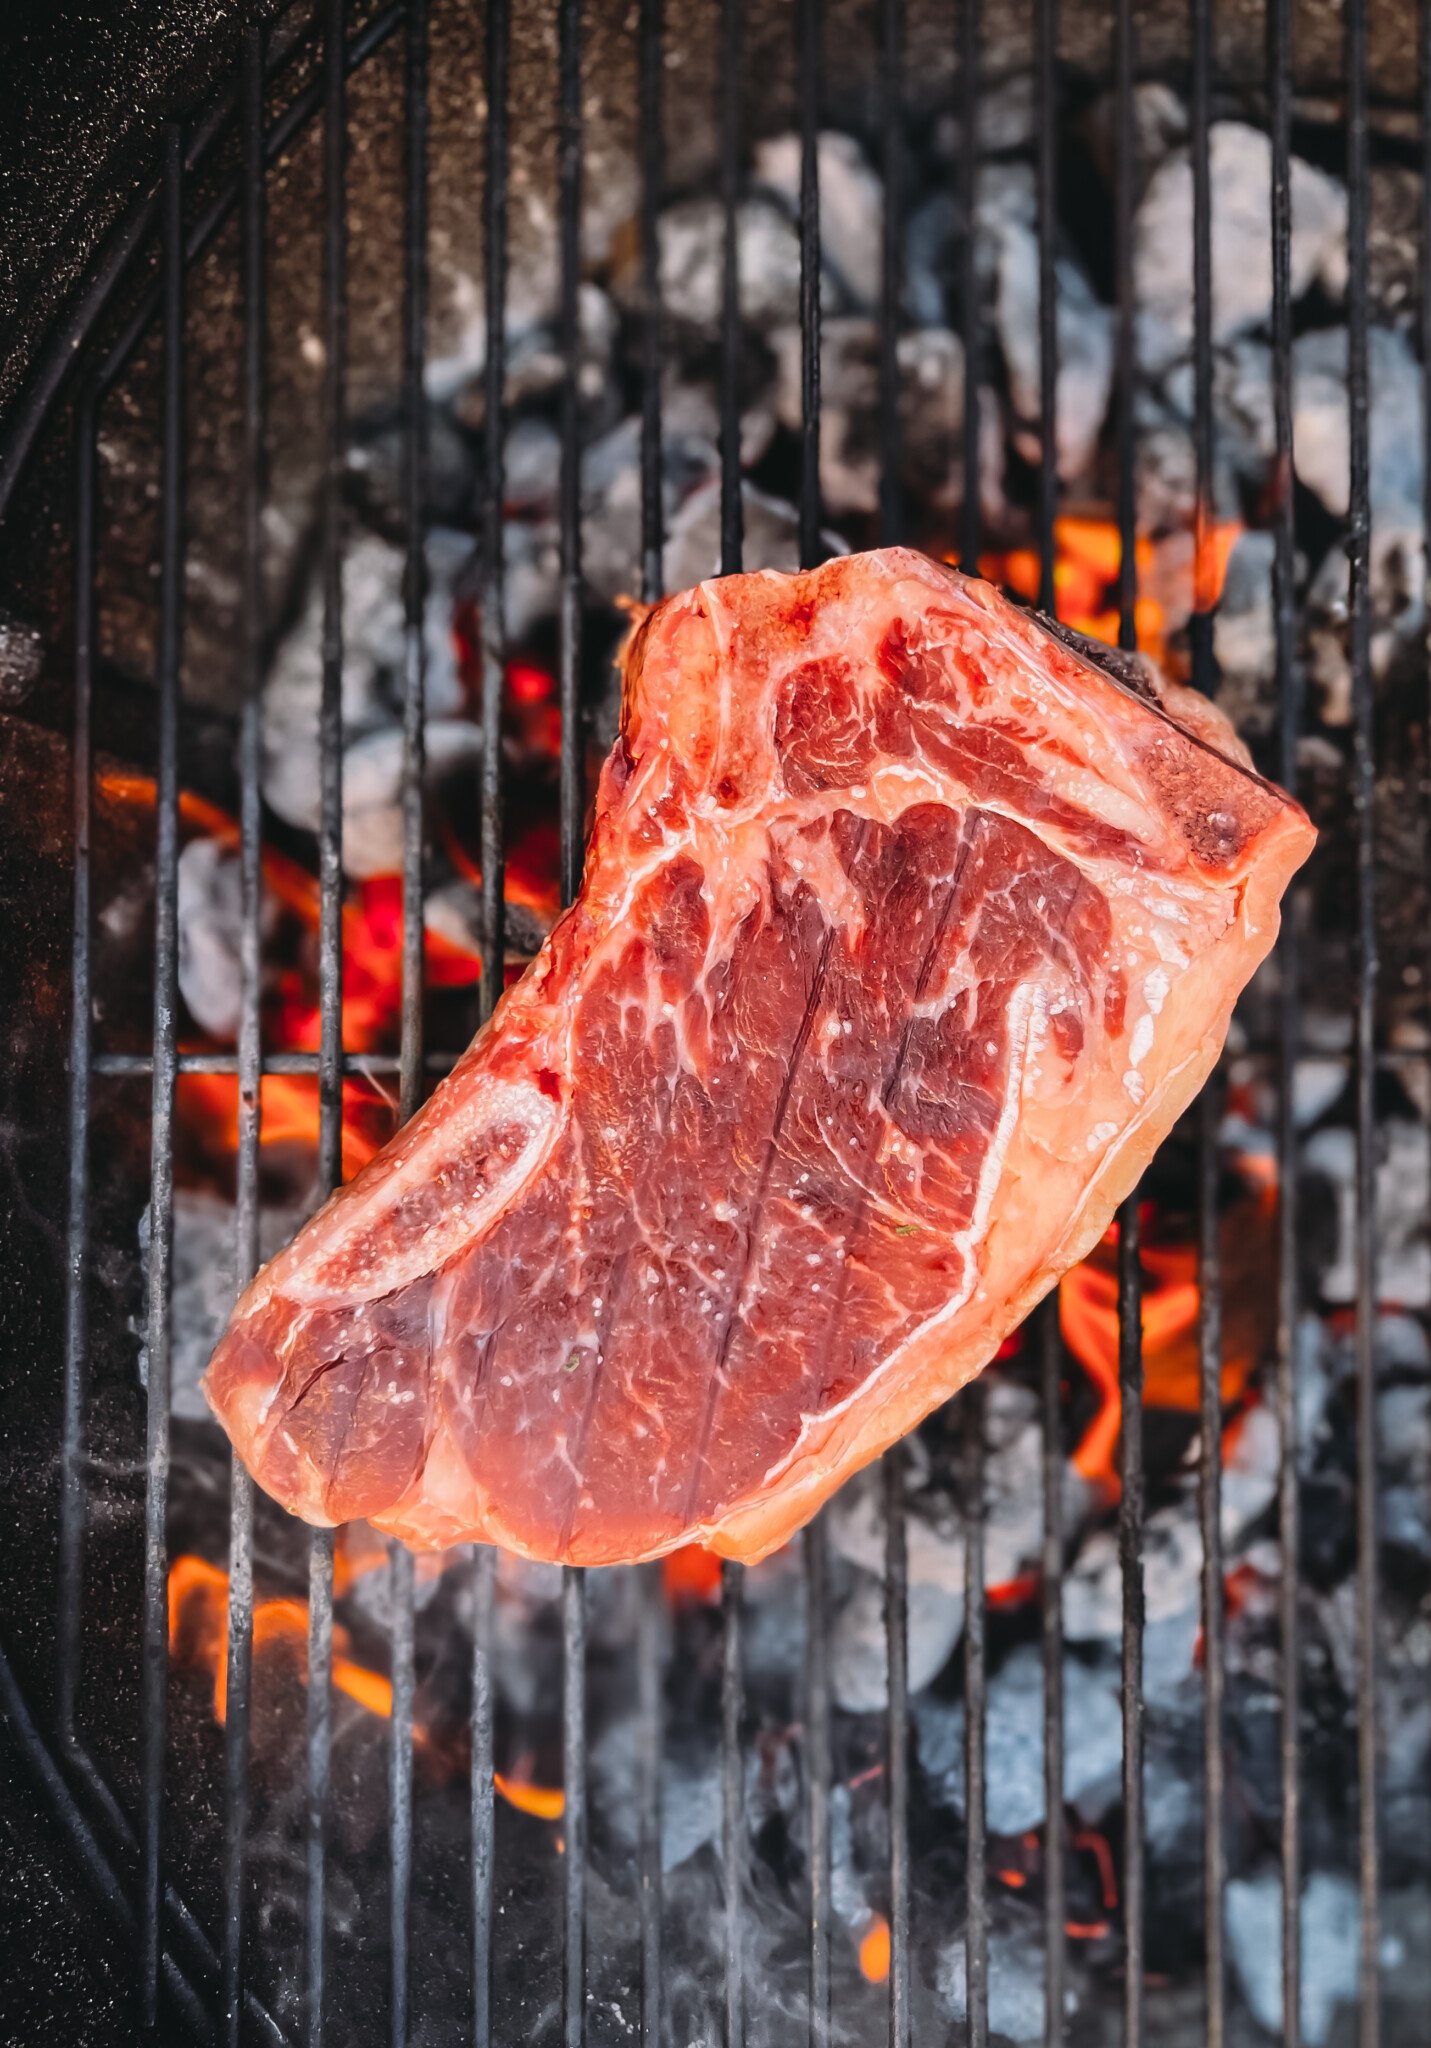
Properly Positioning the Steak on the Grill
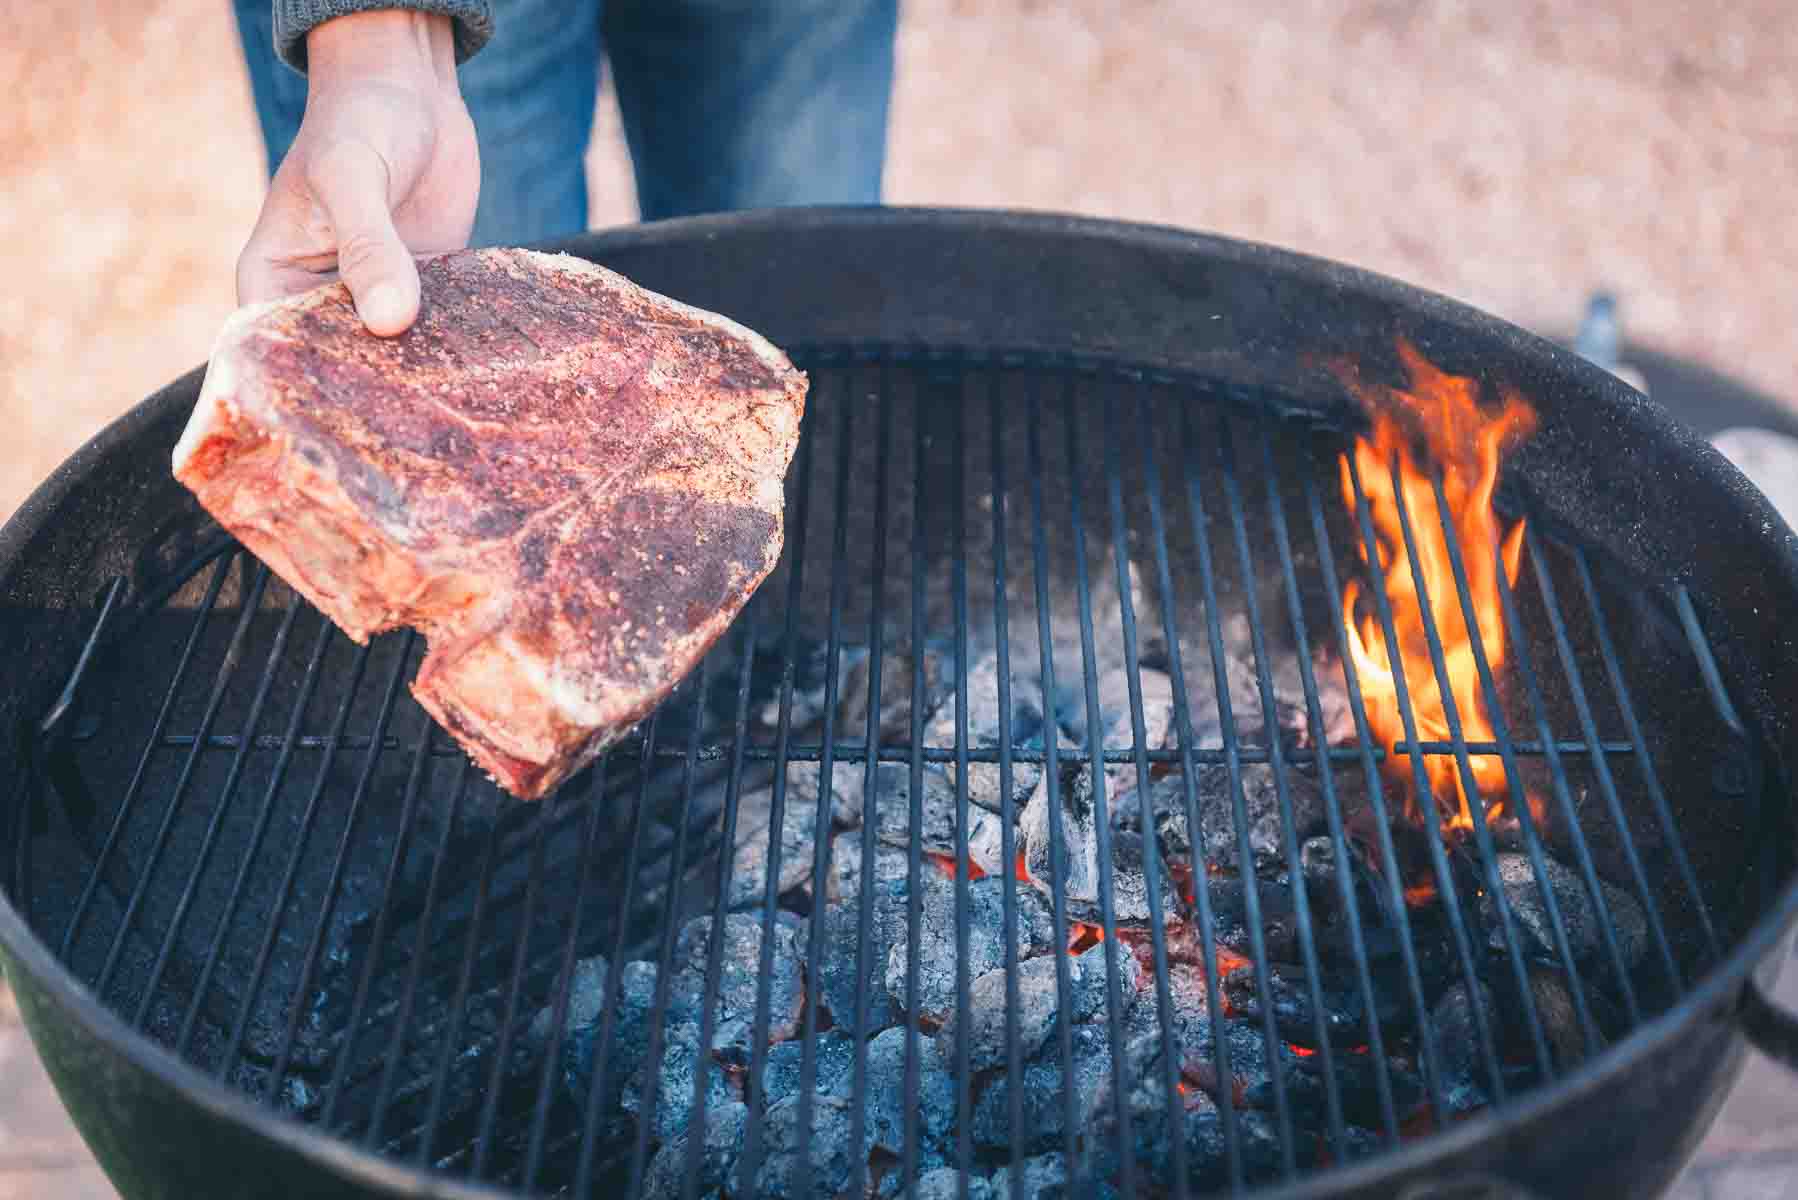
For steaks under 1 1/2″ thick, place your steaks on the direct heat side of the grill. Steaks benefit from direct heat as they’re cooked quick and fast.
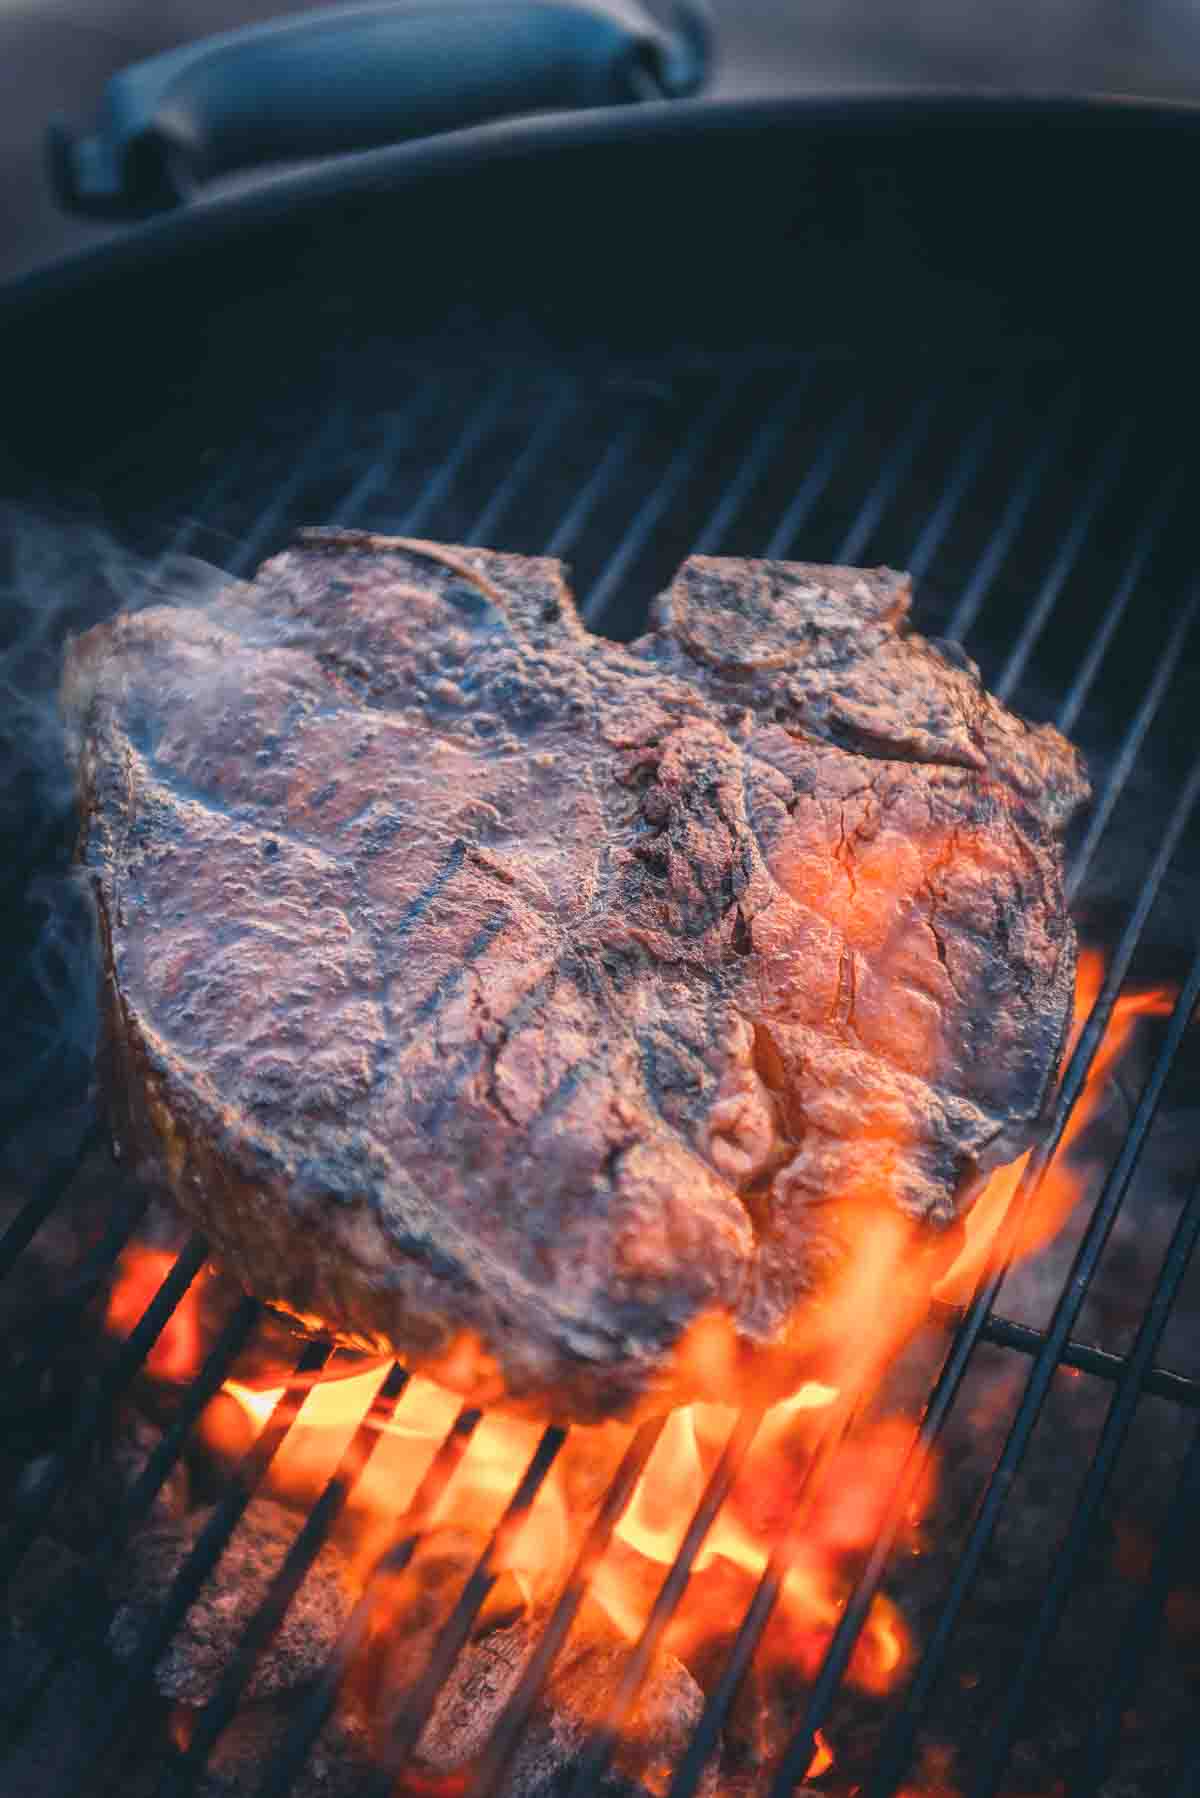
Thicker steaks, like a Porterhouse or Cowboy steak, are better cooked with the reverse sear method, where you start on the cooler side of the grill and finish with a sear.
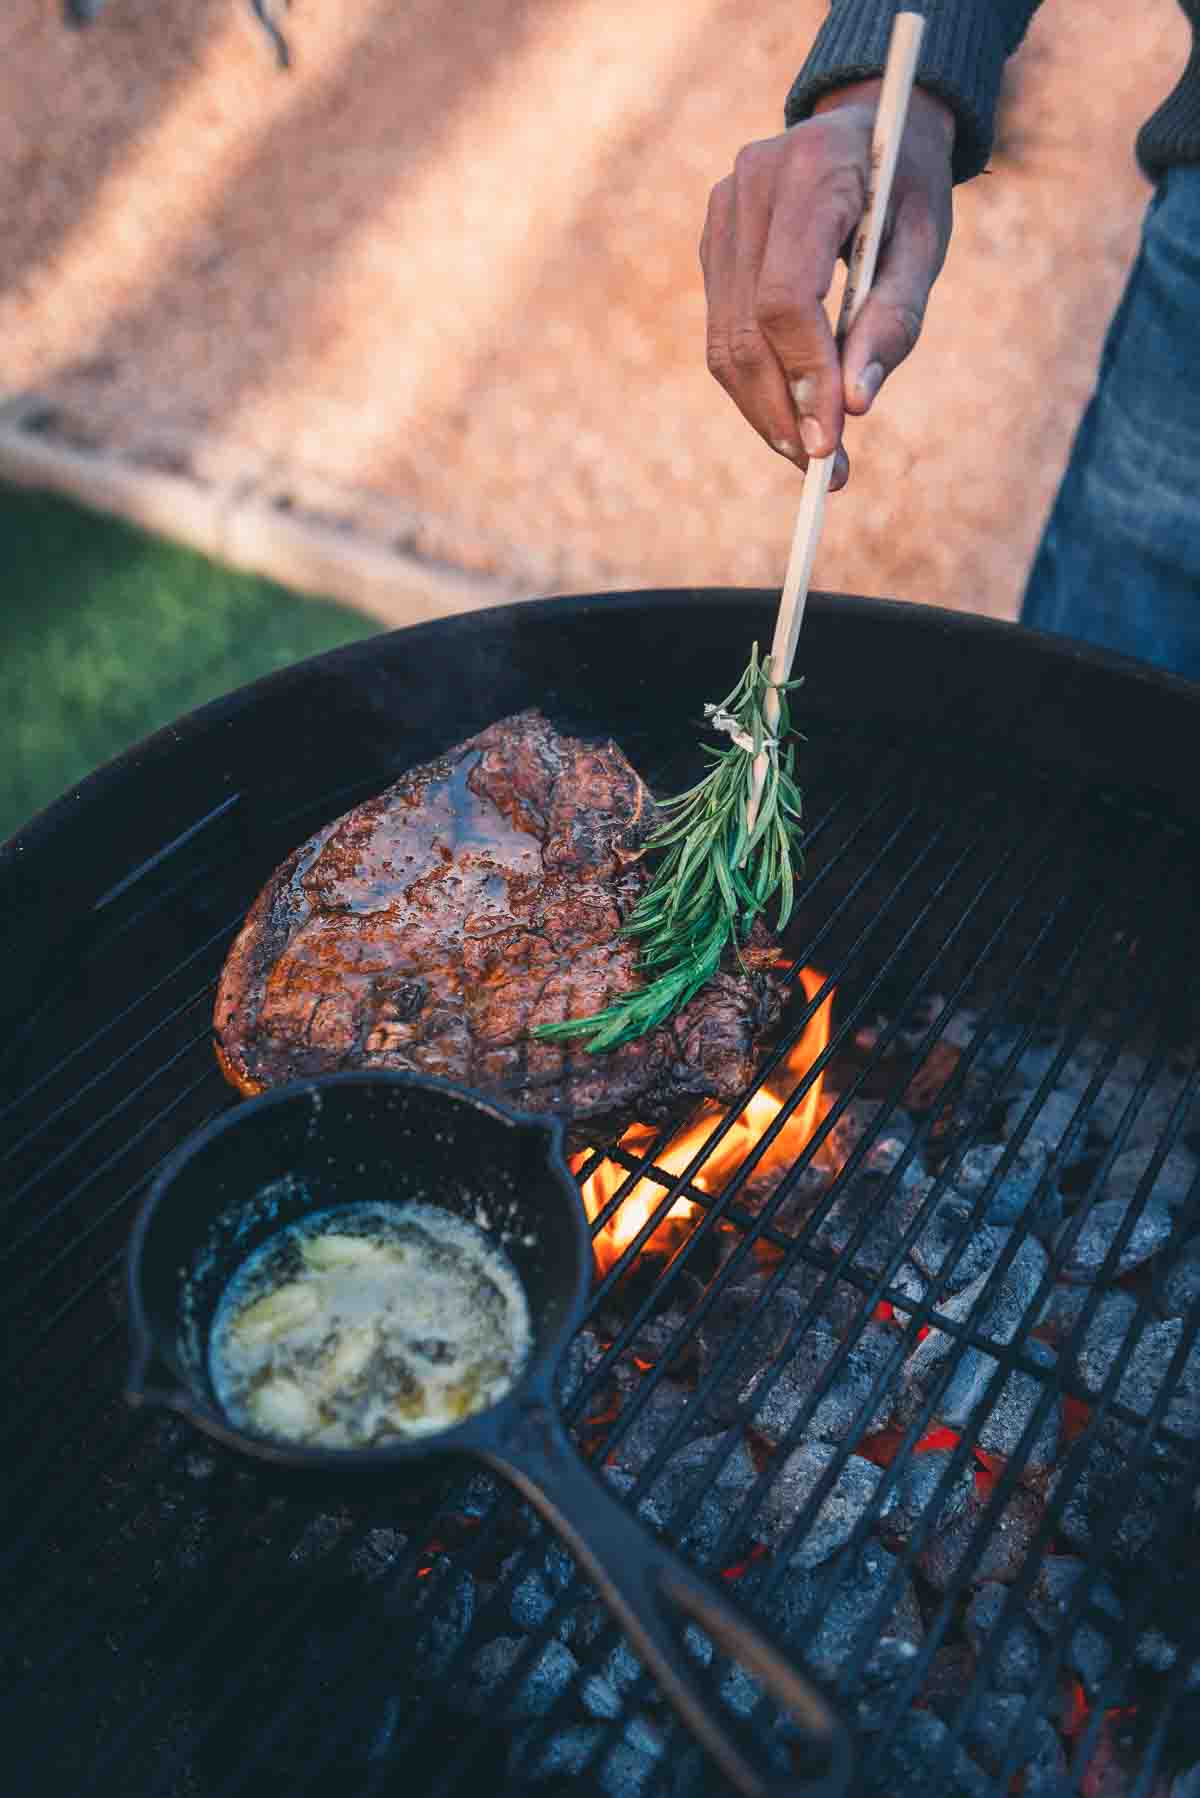
Flipping and Basting for Enhanced Flavor
During the grilling process, flipping your steak multiple times can lend to a more over all crispy crust as the Miallard reaction goes into work, with a juicy interior in even less time than letting it cook for an allotted time per side. We love great diamond grill marks on a steak, but love an edge-to-edge crust even more.
Another tip for crafting the perfect steak is basting with butter and an herb brush. Butter and steak go hand in hand as the butter creates a juicy steak with an irresistible flavor. During the grilling process, feel free to baste melted butter over the top of the steak as it’s cooking, just watch for flareups.
Tips for Achieving Your Desired Steak Temperature
Cooking your steak to perfection requires understanding steak doneness. Here are some factors affecting steak doneness:
- Thickness Matters: The thickness of your steak is like its cooking timer. Thicker cuts take longer to cook through, while thinner ones get to the finish line quicker. Keep an eye on the thickness to nail the perfect doneness.
- Initial Temperature: Your steak’s starting temperature is key. A room-temperature steak cooks more evenly than a chilly one from the fridge. Let it hang out for a bit before hitting the grill.
- Heat Intensity: The grill’s heat is your cooking partner. A searing hot grill locks in juices, creating a juicy interior. Use both sides of the grill, cooking over direct and indirect heat to control the intensity of the heat.
- Resting Time: Patience pays off. Let your steak rest after grilling. This gives the juices a chance to redistribute, ensuring a flavorful and moist result.
The best grilled Steak Recipes
Beef Recipes
Grilled Porterhouse Steak
Beef Recipes
Grilled Bone in Ribeye Steaks
Beef Recipes
Grilled Flank Steak
Beef Recipes
How to Cook a Tomahawk Steak

Advanced Tips
Cooking Methods
There are a few different methods for cooking steak on the grill. Here are some of our favorite options:
Reverse Searing
Reverse searing is a cooking method that involves first slow-cooking the meat at a low temperature and then finishing it with a high-heat sear. This technique is often used for thicker cuts of meat, like a reverse seared prime rib.
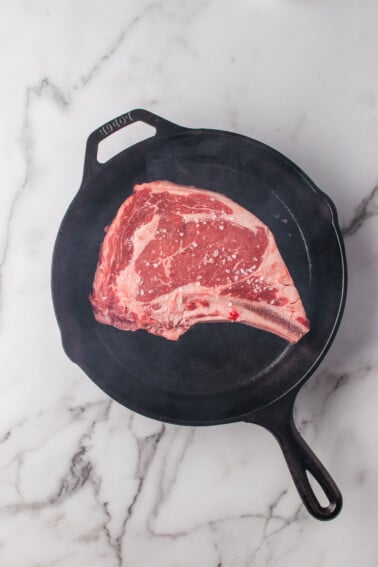
Pan-Searing
Pan searing is a cooking technique where you quickly cook meat, such as steak, in a hot pan with a bit of oil. The high heat helps create a flavorful, caramelized crust on the exterior of the meat while locking in its juices. It’s perfect for recipes like this New York strip steak.
We love to finish a grilled steak in cast iron for an edge-to-edge crust.
How to get Grill Marks (aka, Diamonds)
Use these steps to get those beautiful grill marks on your steak:
- Start by preheating your grill to medium-high heat. Make sure the grates are clean and lightly oiled to prevent sticking.
- Place your steak on the hot grill diagonally to the grates, positioning it at a 45-degree angle.
- After 1 to 3 minutes, rotate the steak 90 degrees to create those classic crosshatch grill marks.
- Allow the steak to cook undisturbed for 1 to 3 minutes longer before flipping it to finish cooking on the other side to your desired internal temperature.
Checking for Doneness
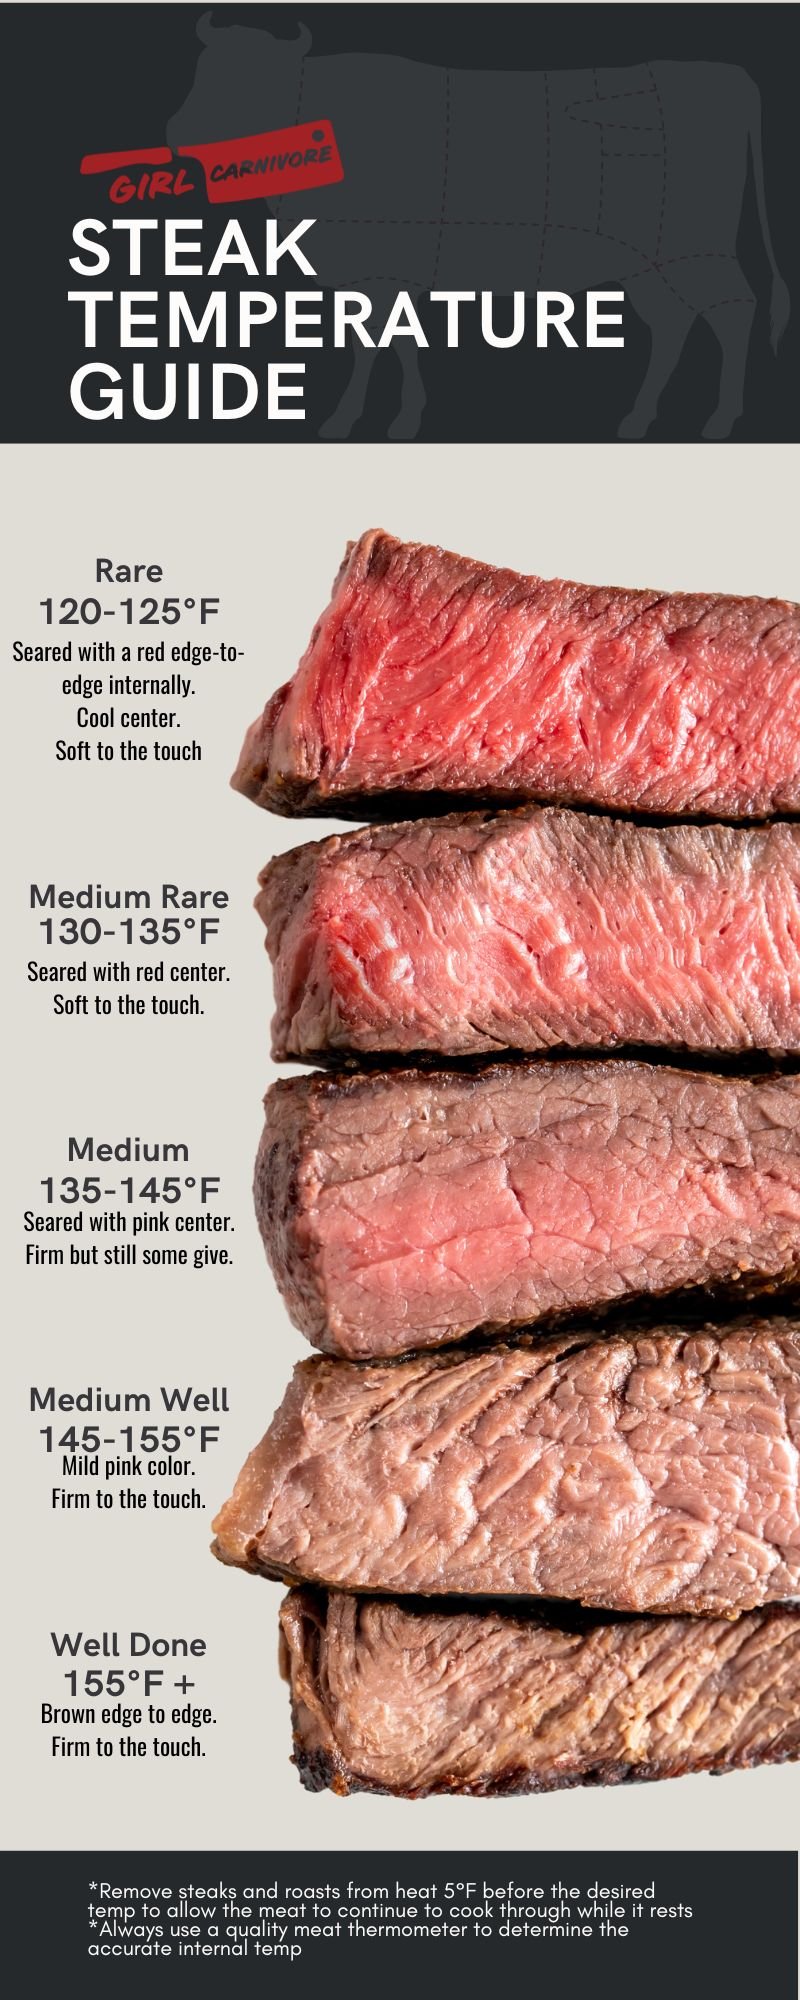
When checking a steak for doneness, you’ll hear that the most common way is to check it with your finger. However, no matter if you’re brand new to grilling steak or a seasoned pro, using a digital thermometer is the more accurate choice. Here are steak temperatures to determine the level of doneness:
Quick Steak Temp Guide
BLUE STEAK TEMPERATURE
- Temperature: 115-120 F
- Color: Bluish-red inside with a quick thin sear outside
- Tenderness: Can be chewy depending on the cut
RARE STEAK TEMPERATURE
- Temperature: 120-125 F
- Color: Bright red center with slight char on the outside
- Tenderness: Very soft
MEDIUM-RARE STEAK TEMPERATURE
- Temperature: 130-135 F
- Color: Warm red center with more browning on the edges
- Tenderness: Evenly soft and tender
MEDIUM STEAK TEMPERATURE
- Temperature: 135-145 F
- Color: Light pink center with a thicker ring of brown
- Tenderness: Soft in the center with firm edges
MEDIUM-WELL STEAK TEMPERATURE
- Temperature: 145-155 F
- Color: Light brown with a touch of pink in the center
- Tenderness: Stiff
WELL-DONE STEAK TEMPERATURE
- Temperature: 155 F plus
- Color: Brown all the way through
- Tenderness: Firm and chewy
After your steak has achieved your desired doneness, it’s important to let it rest. When steak cooks, the heat causes the juices to move toward the center.
Resting allows these flavorful juices to redistribute evenly throughout the meat, ensuring each bite is juicy and succulent. Slicing too soon could lead to a loss of these precious liquids, leaving your steak drier than desired.
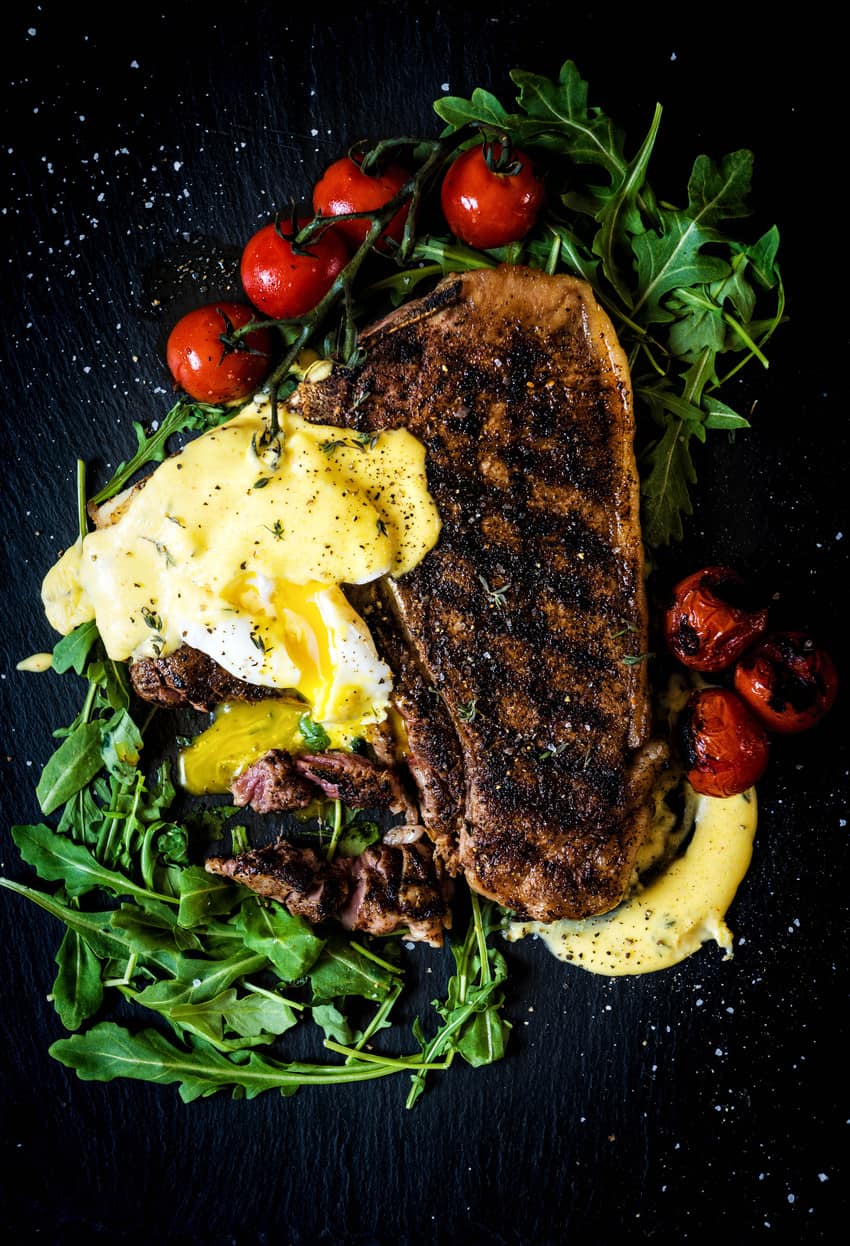
For even more flavor, we like to place a knob of compound butter on the steak as it rests. It will melt over the steak, adding an extra rich layer of umami flavor.

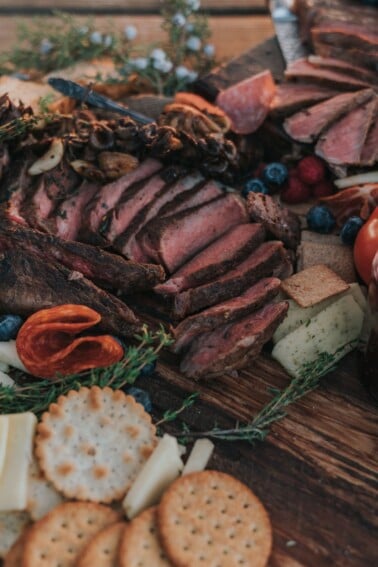
Serving and Enhancing the Steak
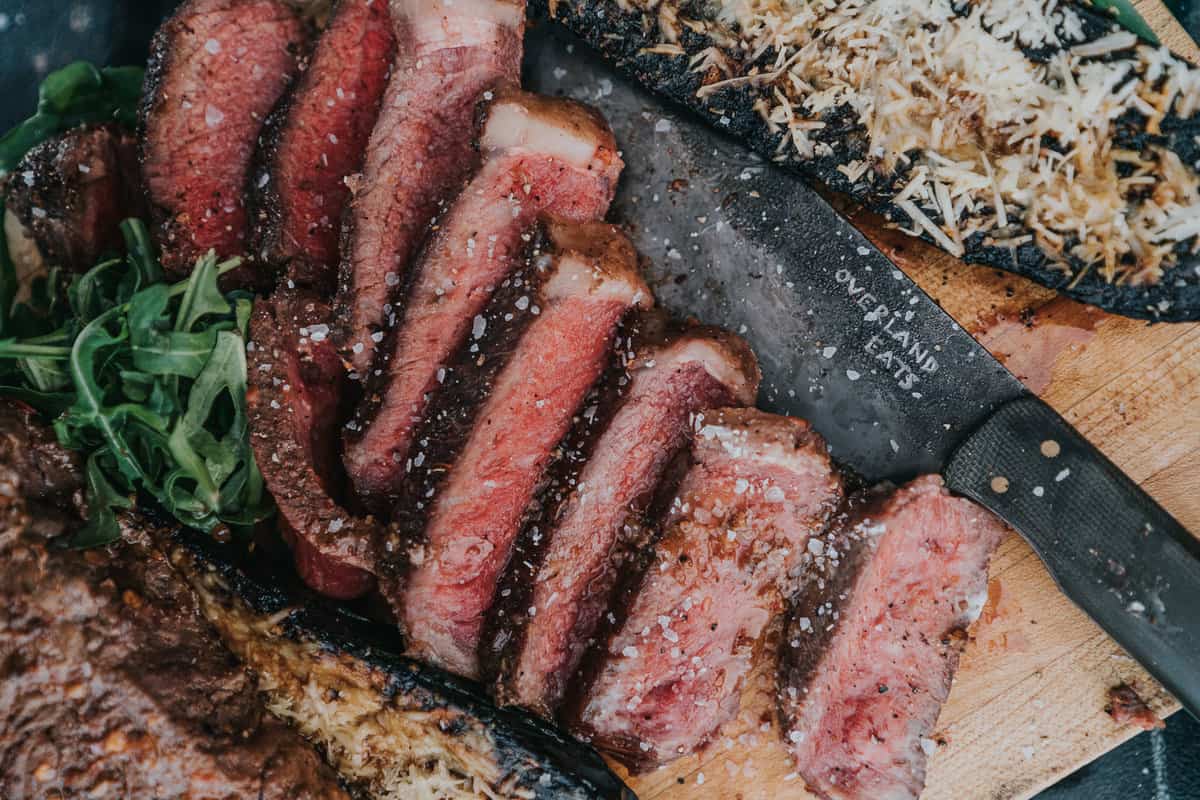
Tips for Slicing and Plating the Steak
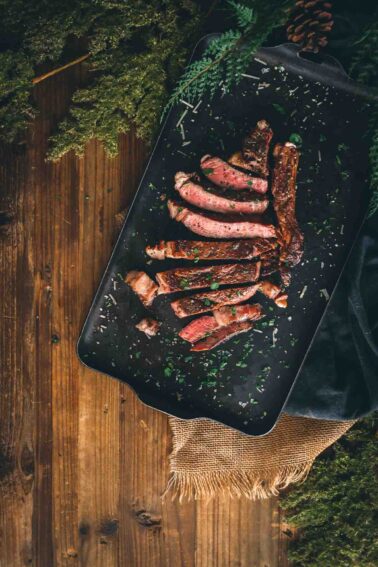
To serve your steak, you’ll want to slice against the grain, shortening the muscle fibers and creating a tender texture.
Enhancing the Flavor with Sauces and Toppings
Although you can totally eat your steak without anything on it, you can jazz things up by adding some sauces or other toppings like crispy onions. For example, this brandy peppercorn sauce pairs beautifully with grilled beef tenderloin or bacon-wrapped filet mignon. If you want a more zesty sauce to pair with your steak, this red chimichurri will do the trick.
Side Dishes and Beverages
After cooking your delicious steak, it’s time to serve it up with some tasty side dishes and beverages! Some of our favorite sides to pair with steak are air fryer corn on the cob, roasted green beans, and duck fat fries.
As for beverages, we typically go with a heavier red wine pairing like Cabernet Sauvignon or Malbec for fattier cuts like ribeye or prime rib. For leaner cuts, we choose lighter reds like Pinot Noir for flank steak, filet mignon, or sirloin.
Troubleshooting and Common Mistakes
- Not preheating the grill: The grill grates may not be hot enough when placing your steak on a non-heated grill, leading to undercooking. Placing your steak on the grill before letting it preheat can lead to uneven cooking. We recommend letting your grill preheat for at least 15 minutes for a nice, even heat.
- You forgot to clean the grates: Cleaning the grates before and after cooking is crucial to ensure no previous food bits get stuck to your steak. This helps the steak not stick or tear when flipping.
- You let the flames get too big: If flare-ups happen, move your steak to the cooler side of the grill using long grilling tongs. If your whole grill is flaming, take a squirt bottle and spray the flames with water to bring them down to normal or simply close the lid. This chokes off the oxygen to the fire and helps the flames extinguish. Always use safety when grilling and follow your grill manufacturer’s instructions.
- You’re not using your vents: Keep your vents open to let the air flow through. Fire needs fuel and air, so adjust your air vents to get a nice even heat.
- Over or Under cooking: You also want to adjust the cooking time depending on the thickness of the steak. For example, thicker steaks will take longer to cook, whereas thinner steaks won’t take as long. Always use a meat thermometer for the best results.
No matter where you’re at in your grilling adventure, there’s nothing like mastering the art of grilling steak. Hopefully, this guide uncovered the best tips for choosing the right cut, prepping and cleaning your grill, and fixing the most common grilling mistakes. Now that you’ve read all about how to grill a steak, it’s time to put your skills to the test.
More helpful grilling guides

How to Grill a Steak on a Charcoal Grill
Recommended Equipment
- 1 charcoal grill we love a classic kettle grill for steaks
- 1 charcoal chimney
- Charcoal We use Cowboy brand charcoal
- 1 natural fire starter or paper. Don't use lighter fluid.
- 1 lighter
- 1 tongs stainless steel with long handle
Ingredients
- 1 1 – 1/2" thick steak
- 1 tsp salt
- 1 tbsp butter or compound butter
Instructions
Prep the Grill
- Start by checking the grill to make sure the ash has been removed and that the grill grates are clean.
- Light your charcoal by pouring coals into a charcoal chimney and setting them over a fire starter. With a long lighter or match, light the fire starter and allow the coals to ignite in the chimney stater.
- Once the coals are about 70-75% ashed over, carefully pour the coals to one side of the grill creating a two-zone fire.
- Put the grill grate on top and close the lid.
- Adjust the air vents for maximum airflow, allow the grill to preheat for 5 more minutes, and allow the grill grate to become searing hot.
- Your coals are ready when they are ashed over and glowing like embers, putting out enough heat that you can only hold your hand over the grill grates for a few seconds.
Prep the Steak
- Meanwhile, prep the steak by removing it from the package and patting it dry.
- Season the steak liberally on all sides with salt and let it rest until the grill is preheated.
Grill the Steak
- Once the grill is preheated to around 400 – 450 degrees F, place the steak on the grill grate over the direct heat at a 45 degree angle.
- If the steaks are over 1 1/2" thick, consider using the reverse sear method.
- Allow the steaks to cook for 60 to 90 seconds minutes.
- Using long tongs, gently rotate the steak 90 degrees to create grill marks and cook for 60 seconds to 2 minutes longer, depending on the thickness of the steak and your personal desired doneness.
- Using the tongs, flip the steak and continue to cook until your desired internal temperature is reaches, 2 to 4 minutes longer. Use a digital meat thermomter for the most accurate results.
- Always use caution, as cooking steak over direct heat can cause flare-ups. You can always transfer the steak to the cooler side of the grill to let any flames die down.
- If your steak has a thick fat cap on the side, consider using the long grilling tongs to hold the fatcap over the hot grill grates to sear it.
- Carefully transfer the steaks from the grill to a rimmed baking sheet or cutting board.
Rest and Serve
- Place a dollop of compound butter over the grilled steaks and tent it loosely with foil.
- Allow the steak to rest for 5 to 7 minutes before slicing against the grain into 1/4" pieces with sharp knife.
- As you slice, the color of the steak will 'bloom' as the slices meat is exposed to the oxygen causing the color to become more intense.
- Season with a pinch of salt and serve immediately.
Notes
Bookmark this recipe now!