The craving for a bacon cheeseburger hits before you’ve decided what’s for dinner. We know because it happens to us all the time. It’s a constant debate between tacos and burgers, but by the time the grill is hot, the bacon is already in the pan, and the call has been made. This is the classic cheeseburger that wins the ‘what’s for dinner’ battle every time.
We’ve run 80/20 against 90/10 in the GC Meat Labs and know one truth about good burgers. Fat is flavor. The 90/10 version is fine… but it’s noticeably worse in a way that’s hard to explain until you’ve eaten both back-to-back. The 20% fat isn’t excessive (heck, for us, we’ve been known to go 70/30). The fat is the flavor; it makes the crust and keeps the burgers juicy. This isn’t the time to skimp.
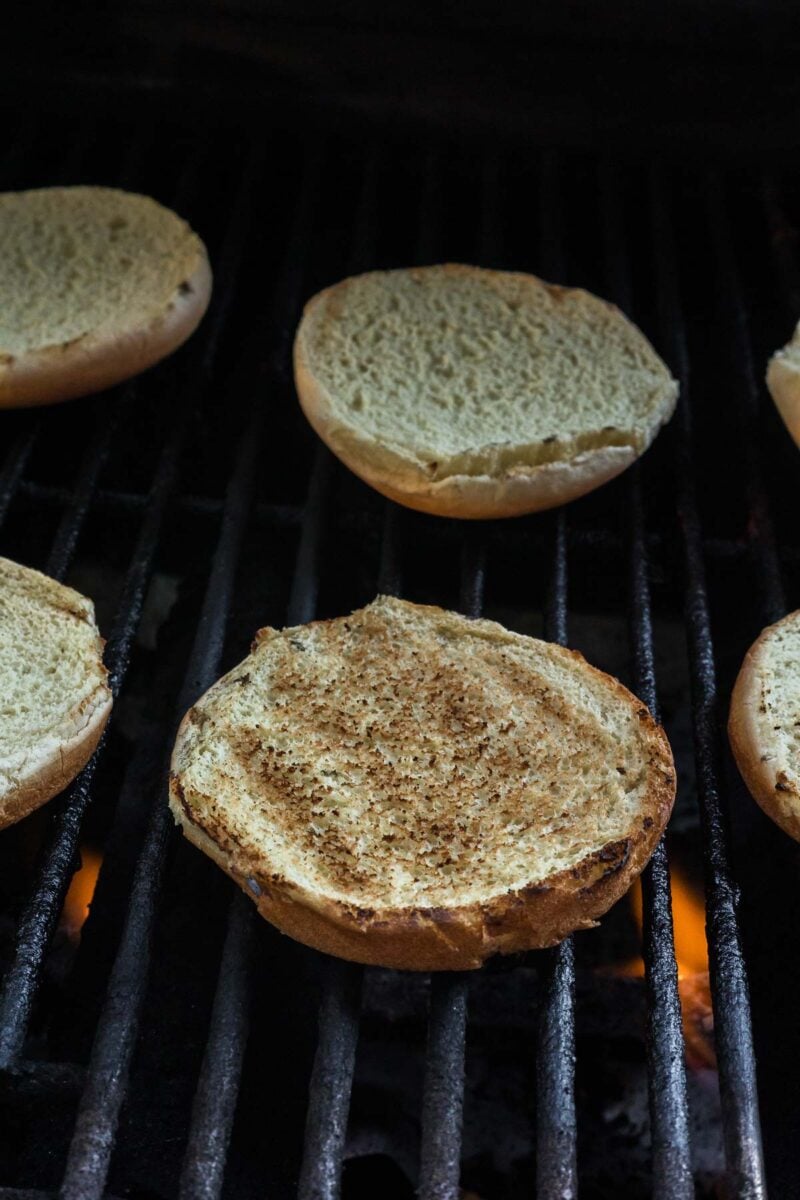
Pay attention to the flip. When the crust has fully set, the patty releases from the grate on its own. No prying, no tearing; it’s a smooth, easy motion. The final 90 seconds are for melting the cheese, then you pile on all your favorite toppings. But who am I trying to convince? You already know what’s for dinner.
🔪 Ingredients for Classic Bacon Cheeseburger
For the Patties:
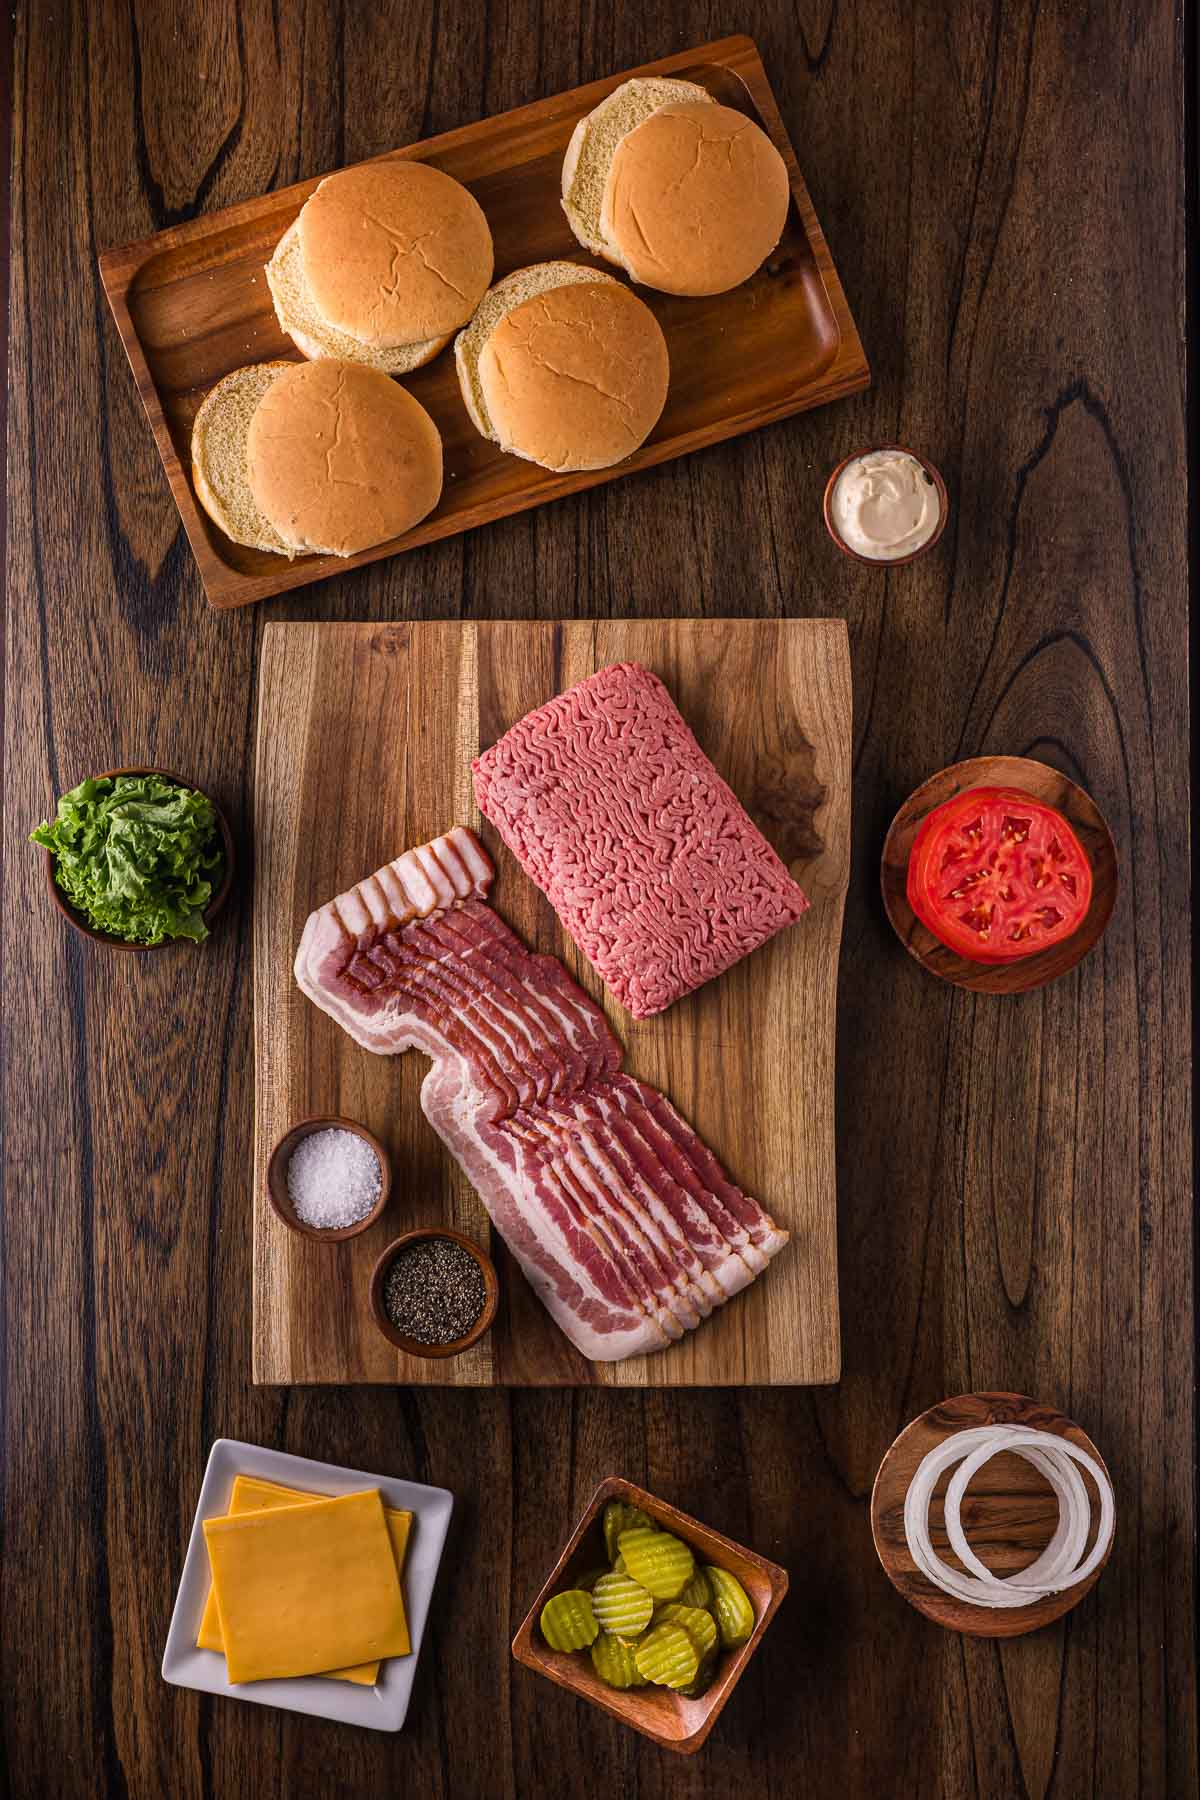
- Ground beef (80/20): Ground chuck is the right call. The 20% fat is what gives you a juicy patty with actual crust development. Leaner blends cook up dry. Find more ways to cook with it in our ground beef recipes.
- Kosher salt
- Black pepper: Coarse-ground holds up better on a hot grate than fine-ground.
For the Build:
- Thick-cut bacon: Not regular sliced. Thick-cut holds its structure and crisps with actual chew. If you want to go a step further, onion bacon jam on the top bun is not a subtle move and is entirely worth it.
- American cheese: Go classic, but if you’re feeling bold, use cheddar.
- Soft hamburger buns: A potato bun or soft brioche-style bun is the right choice here. It holds up to the weight without overpowering the beef.
- Mayonnaise
- Dill pickle slices: The acid cut. Don’t skip them.
- Green leaf lettuce
- Tomato: Sliced thin.
- White onion: Sliced thin or in rings.
Equipment
- Grill (gas or charcoal): Set up for direct and indirect heat. You want a hot zone for the sear and a cooler zone if flare-ups happen.
- Long-handled tongs: For flipping and for oiling the grates.
- Instant-read thermometer: Pull the patty when its internal temperature reaches 160°F, according to USDA guidelines.
- Paper towels and neutral oil: For wiping the grates before the patties go on.
📝 How to Make Classic Bacon Cheeseburger
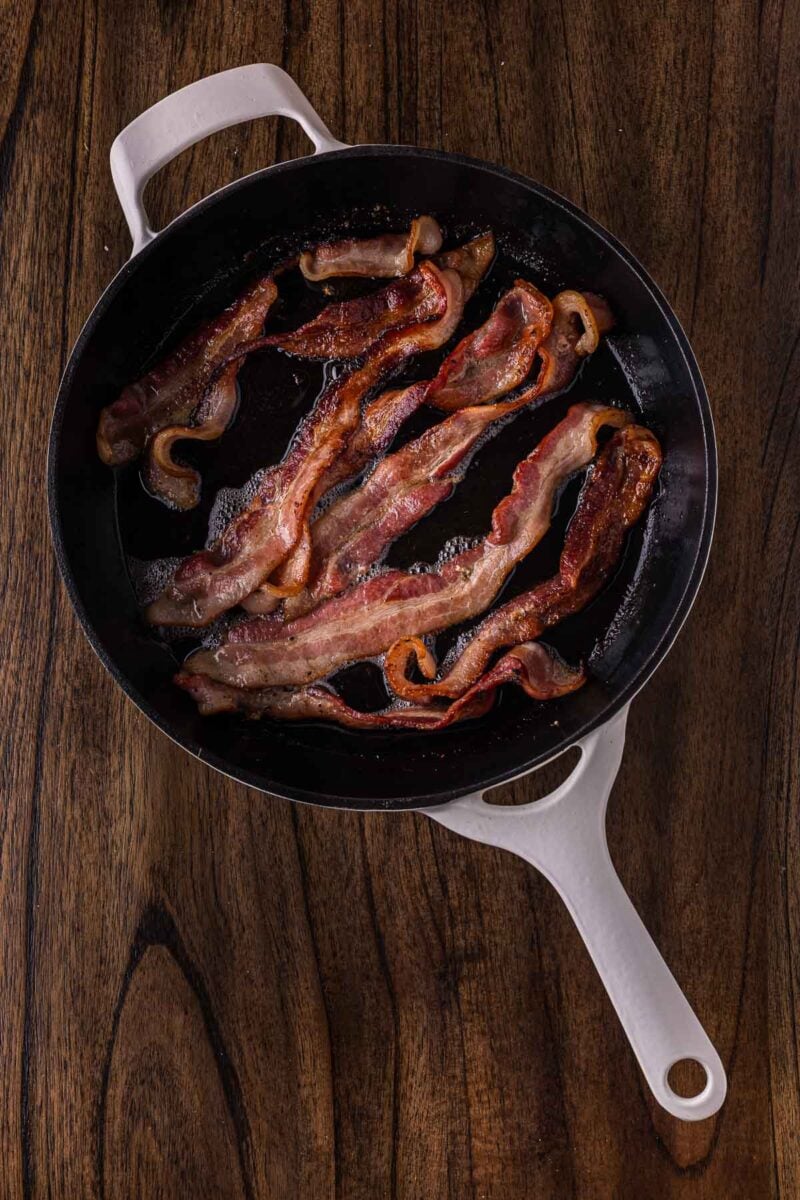
- Cook the bacon in a skillet over medium heat, or in a 400°F oven on a wire rack, until crisp, about 8–10 minutes. Drain on paper towels and set aside. It holds well for at least 30 minutes, so start here.
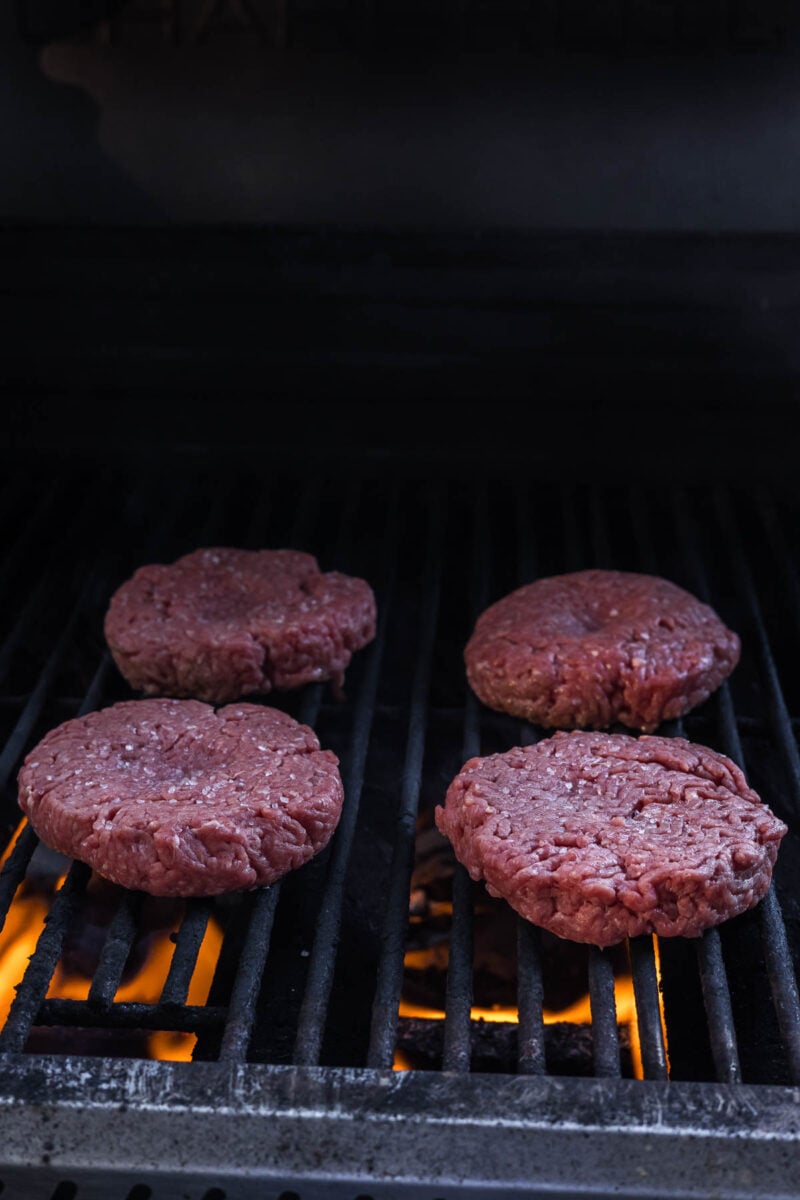
- Preheat the grill to medium-high, targeting 400–450°F at the grate. Clean the grates, then oil them by folding a paper towel into a tight pad, dipping it in neutral oil, and wiping the grates with tongs.
- Divide the beef into 4 equal portions, about 8 oz each. Handle them as little as possible; overworking compresses the protein, leaving you with a dense, bouncy patty instead of a loose, juicy one. Gently press each portion into a patty about 3/4-inch thick.
- Press a thumb indent into the center of each patty, about 1/2-inch deep. This prevents the center from doming during cooking. Without it, the burger puffs and you’ll instinctively press down on it, squeezing out all the juice.
- Season both sides generously with kosher salt and black pepper immediately before they go on the grill. Salt draws moisture to the surface; season early, and you lose that moisture to evaporation instead of keeping it inside the patty.
- Place patties over direct heat and cook undisturbed for 4–5 minutes. When the crust has set, the patty releases cleanly from the grate. If it sticks, give it another 30 seconds. Do not force it.
- Flip once. Cook 3–4 more minutes. In the last 60–90 seconds, lay a slice of American cheese over each patty and close the lid to trap the heat. Pull when internal temp hits 160°F — the patty should feel firm with just a slight give in the center.
- Toast the bun halves, cut-side down, on the grates for 60–90 seconds, until lightly golden. Watch them; they go from golden to burnt quickly.
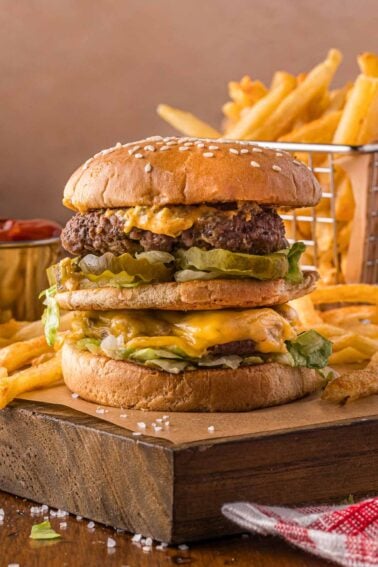
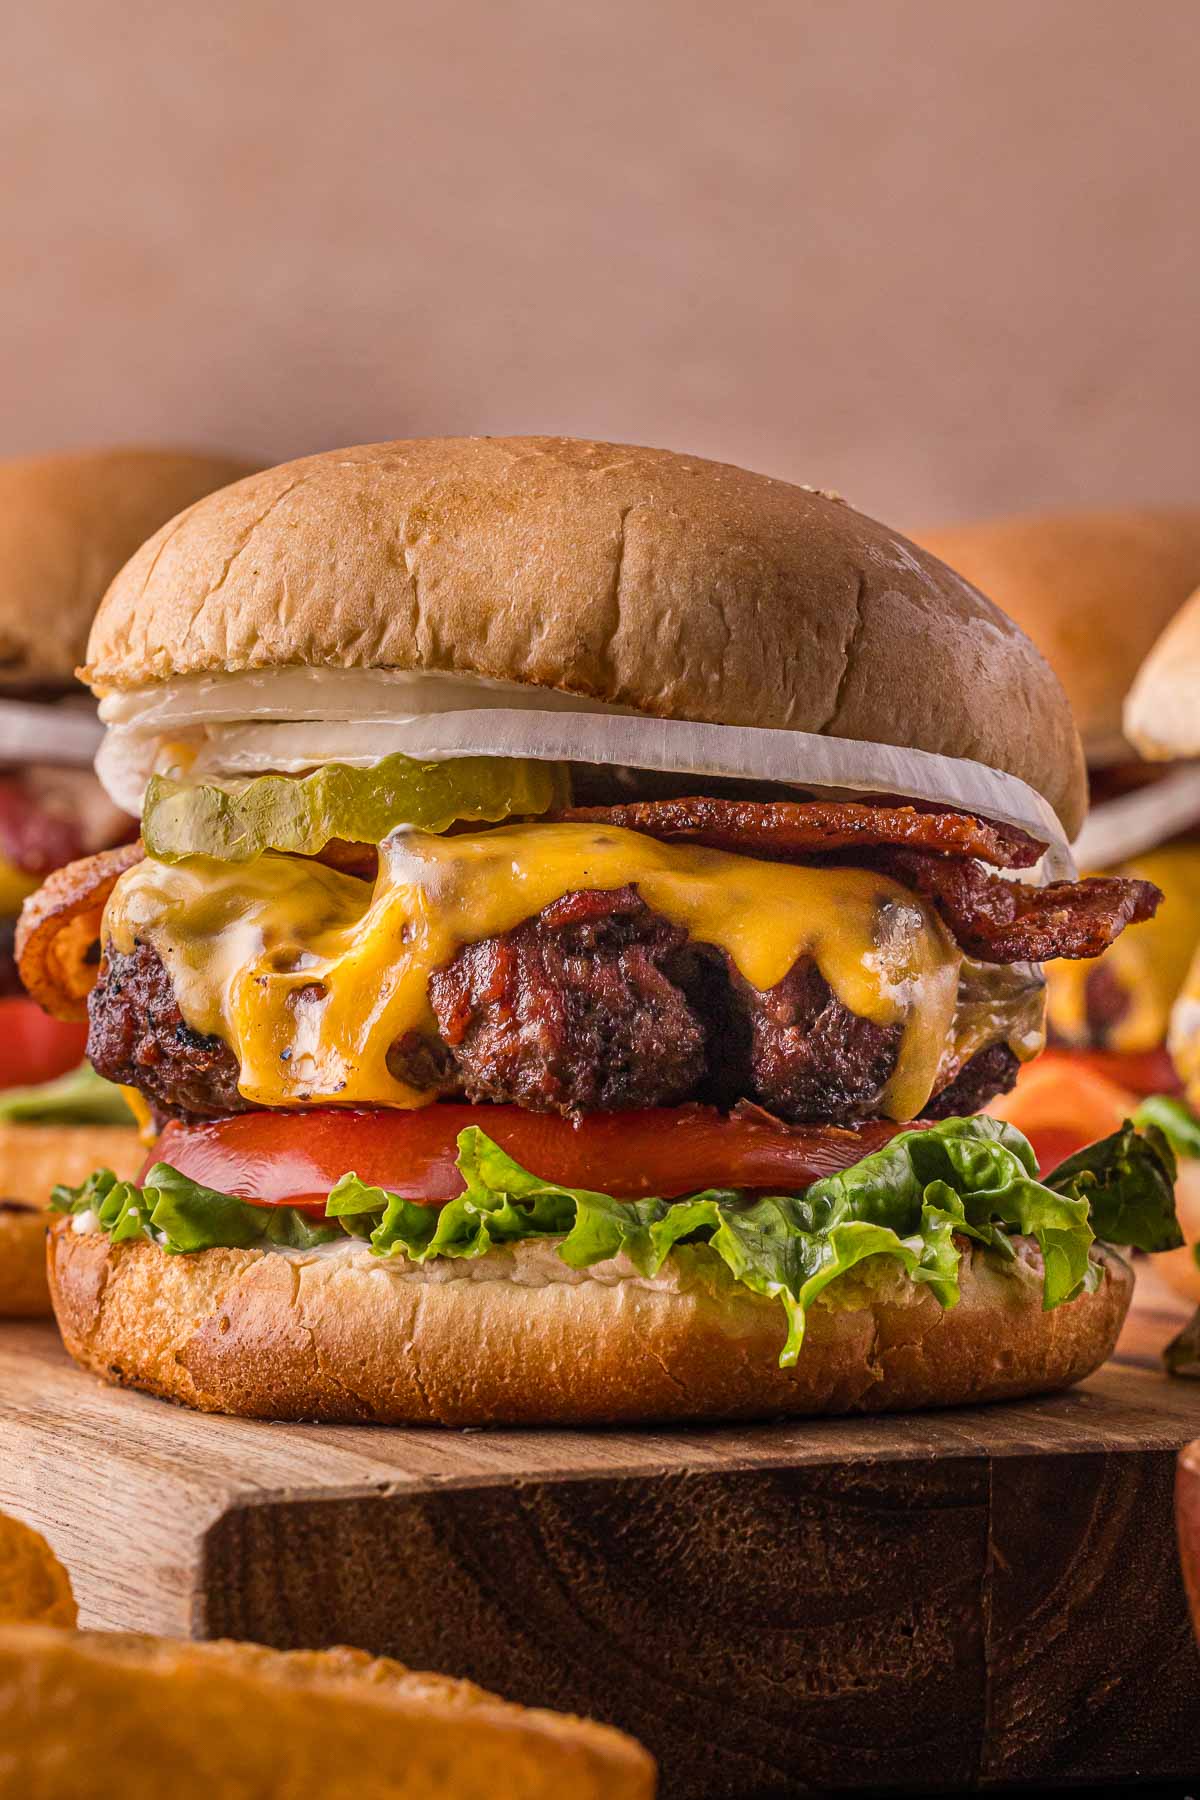
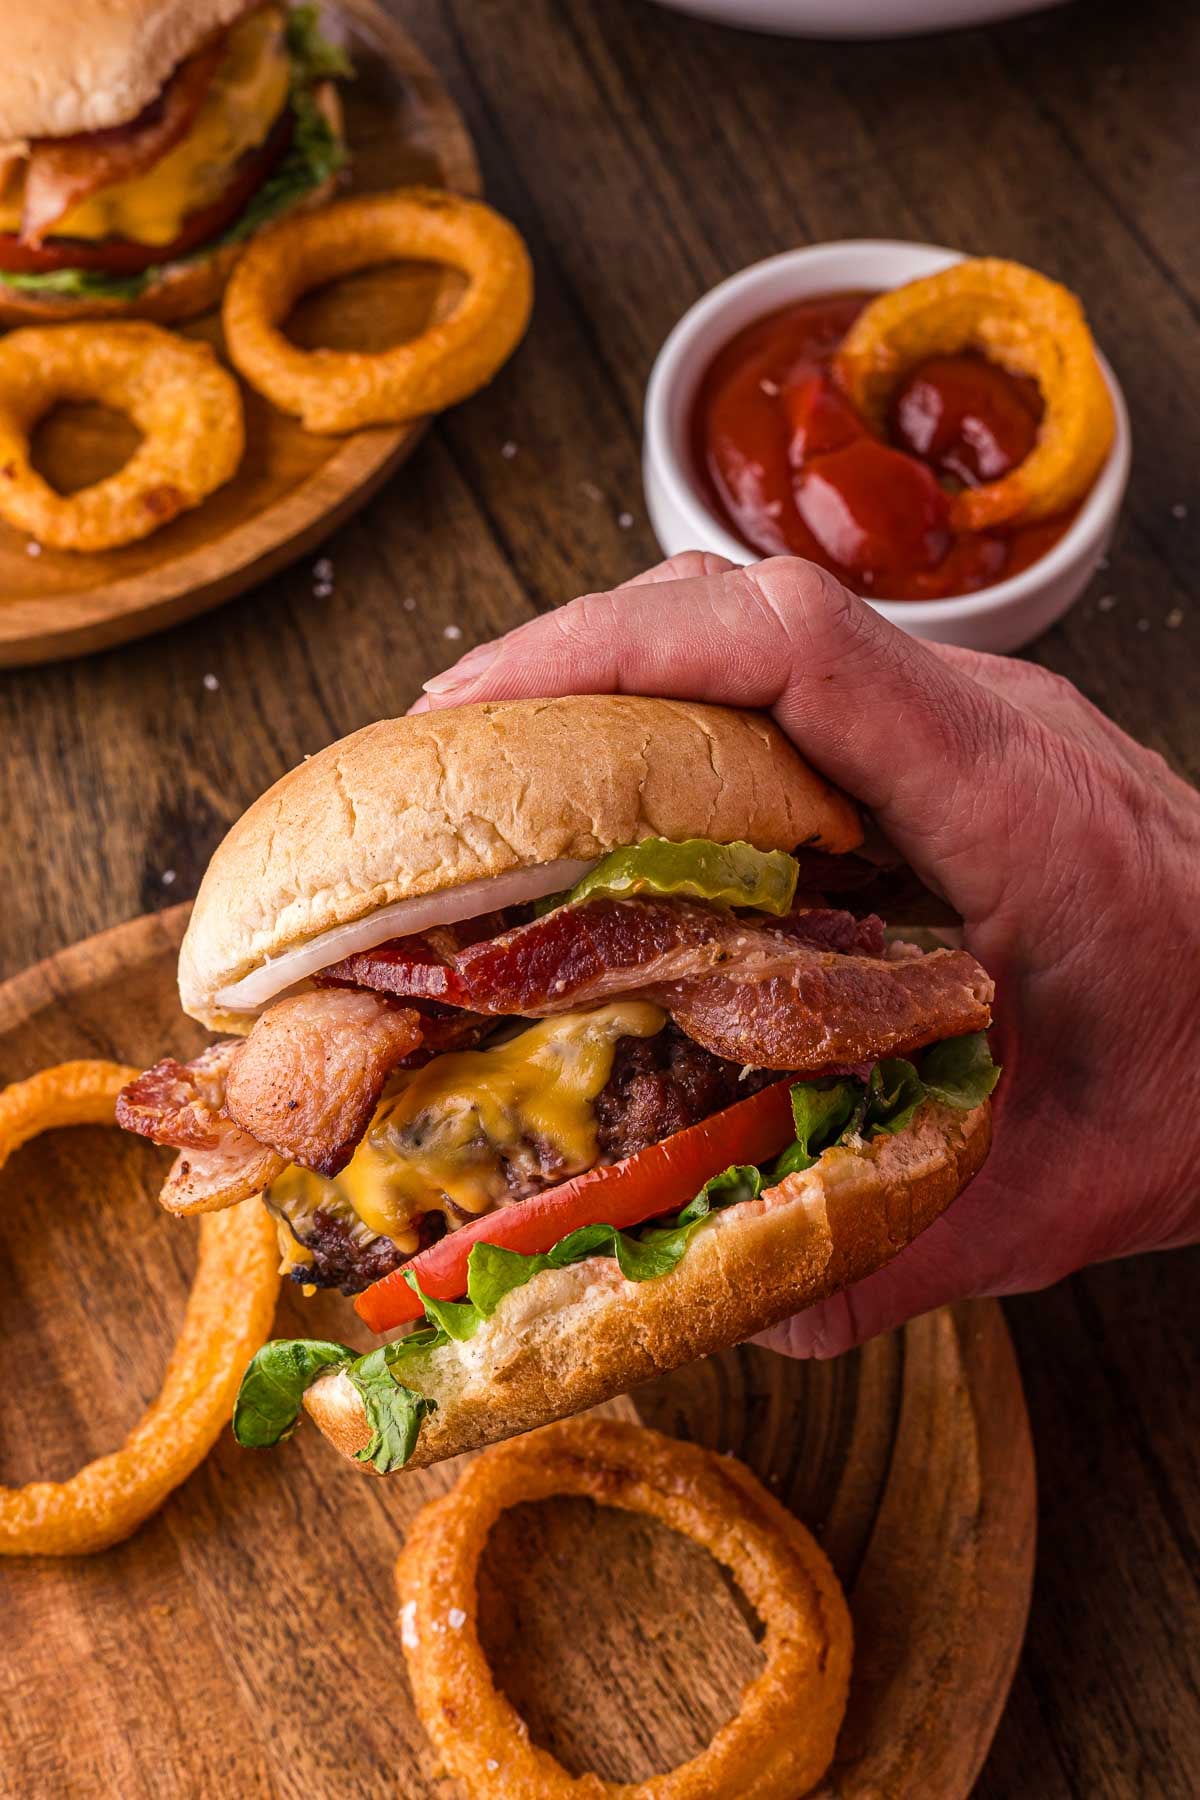
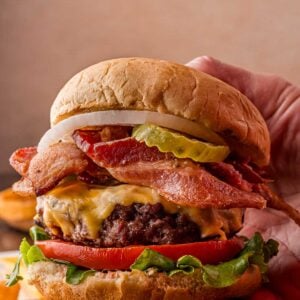
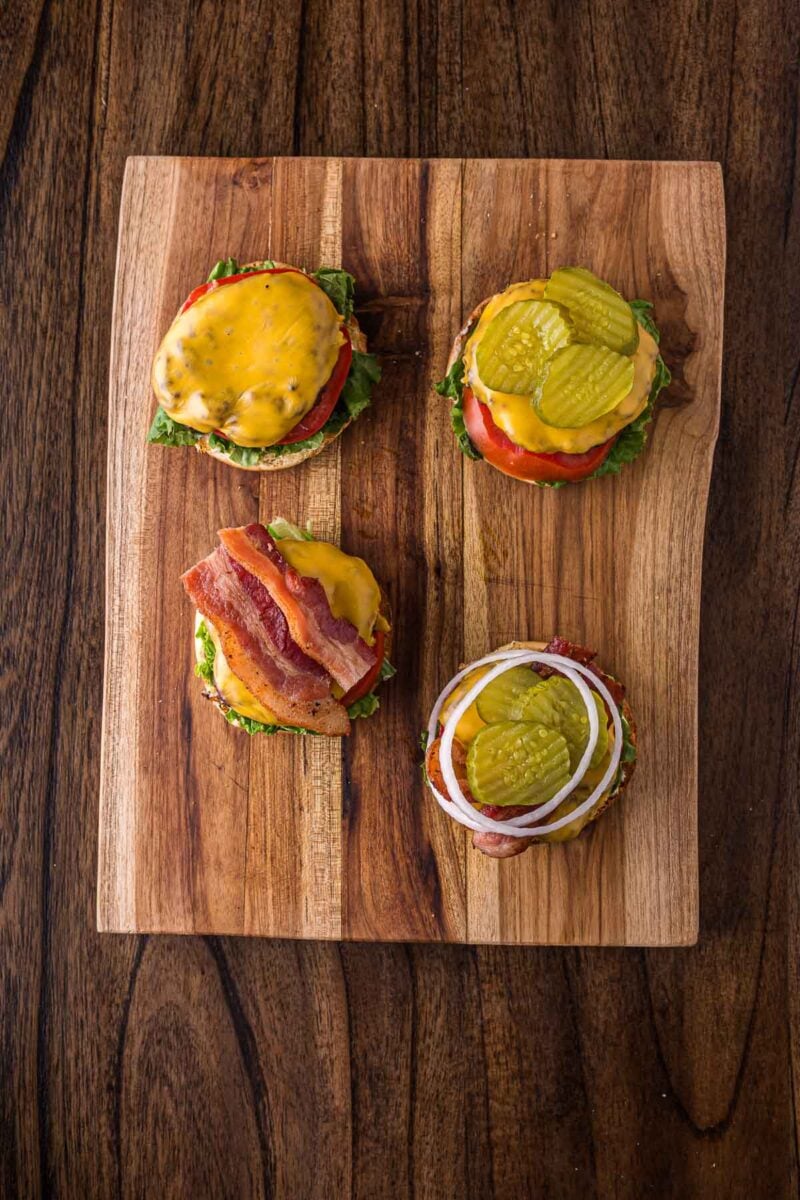
- Assemble: spread mayo on both cut sides of each bun. Layer the bottom bun with lettuce, tomato, white onion, the patty with melted cheese, two strips of crispy bacon, and dill pickles. Cap and serve immediately.
🔄 Substitutions
- 90/10 ground beef for 80/20: The patty will be noticeably drier with less crust development. Fat is the flavor and the moisture here. If you have to use leaner beef, don’t press down on the patties at all during cooking.
- Cheddar for American cheese: It melts but can break and turn oily if the grill temperature spikes. Young mild cheddar holds better than sharp. American’s melt is cleaner for this application.
- Turkey bacon for thick-cut: Crisps faster, and the flavor difference is real. It also lacks the fat drip that bastes the patty as it sizzles on the grate above. Functional substitute, not a direct replacement.
- Brioche bun for soft hamburger bun: Richer and toasts faster — watch it closely, brioche goes from golden to burnt in under a minute. Can fall apart under heavy toppings.
- Romaine for green leaf lettuce: Crunchier and holds up better if there’s any lag between assembly and eating. Green leaf wilts faster against a hot patty.
- Red onion for white onion: Slightly sharper bite and better visual contrast. Fully interchangeable raw.
💡 Meat Nerd Tips
- Don’t salt in advance. Salted ground beef starts releasing moisture immediately, and the proteins begin to bind, which means a denser texture by the time the patty hits the grill. Season right before it goes on, not 10 minutes ahead.
- Two strips per burger is load-bearing architecture. One strip disappears under the cheese. Three strips and the whole burger falls apart on the first bite. Two strips, positioned crosswise so you hit both on every bite, is the number.
- Cold patties sear better. Pull the beef from the fridge 15 minutes before cooking, not 30. A cold patty takes slightly longer to cook through, which gives the exterior more time at high heat to develop a crust before the inside overcooks.
- Set up two zones even for a simple burger cook. Charcoal or gas, you want a hot direct zone and a cooler indirect zone. When fat hits the grates and flares up, you need somewhere to move the patties fast without burning the crust you just spent five minutes building.
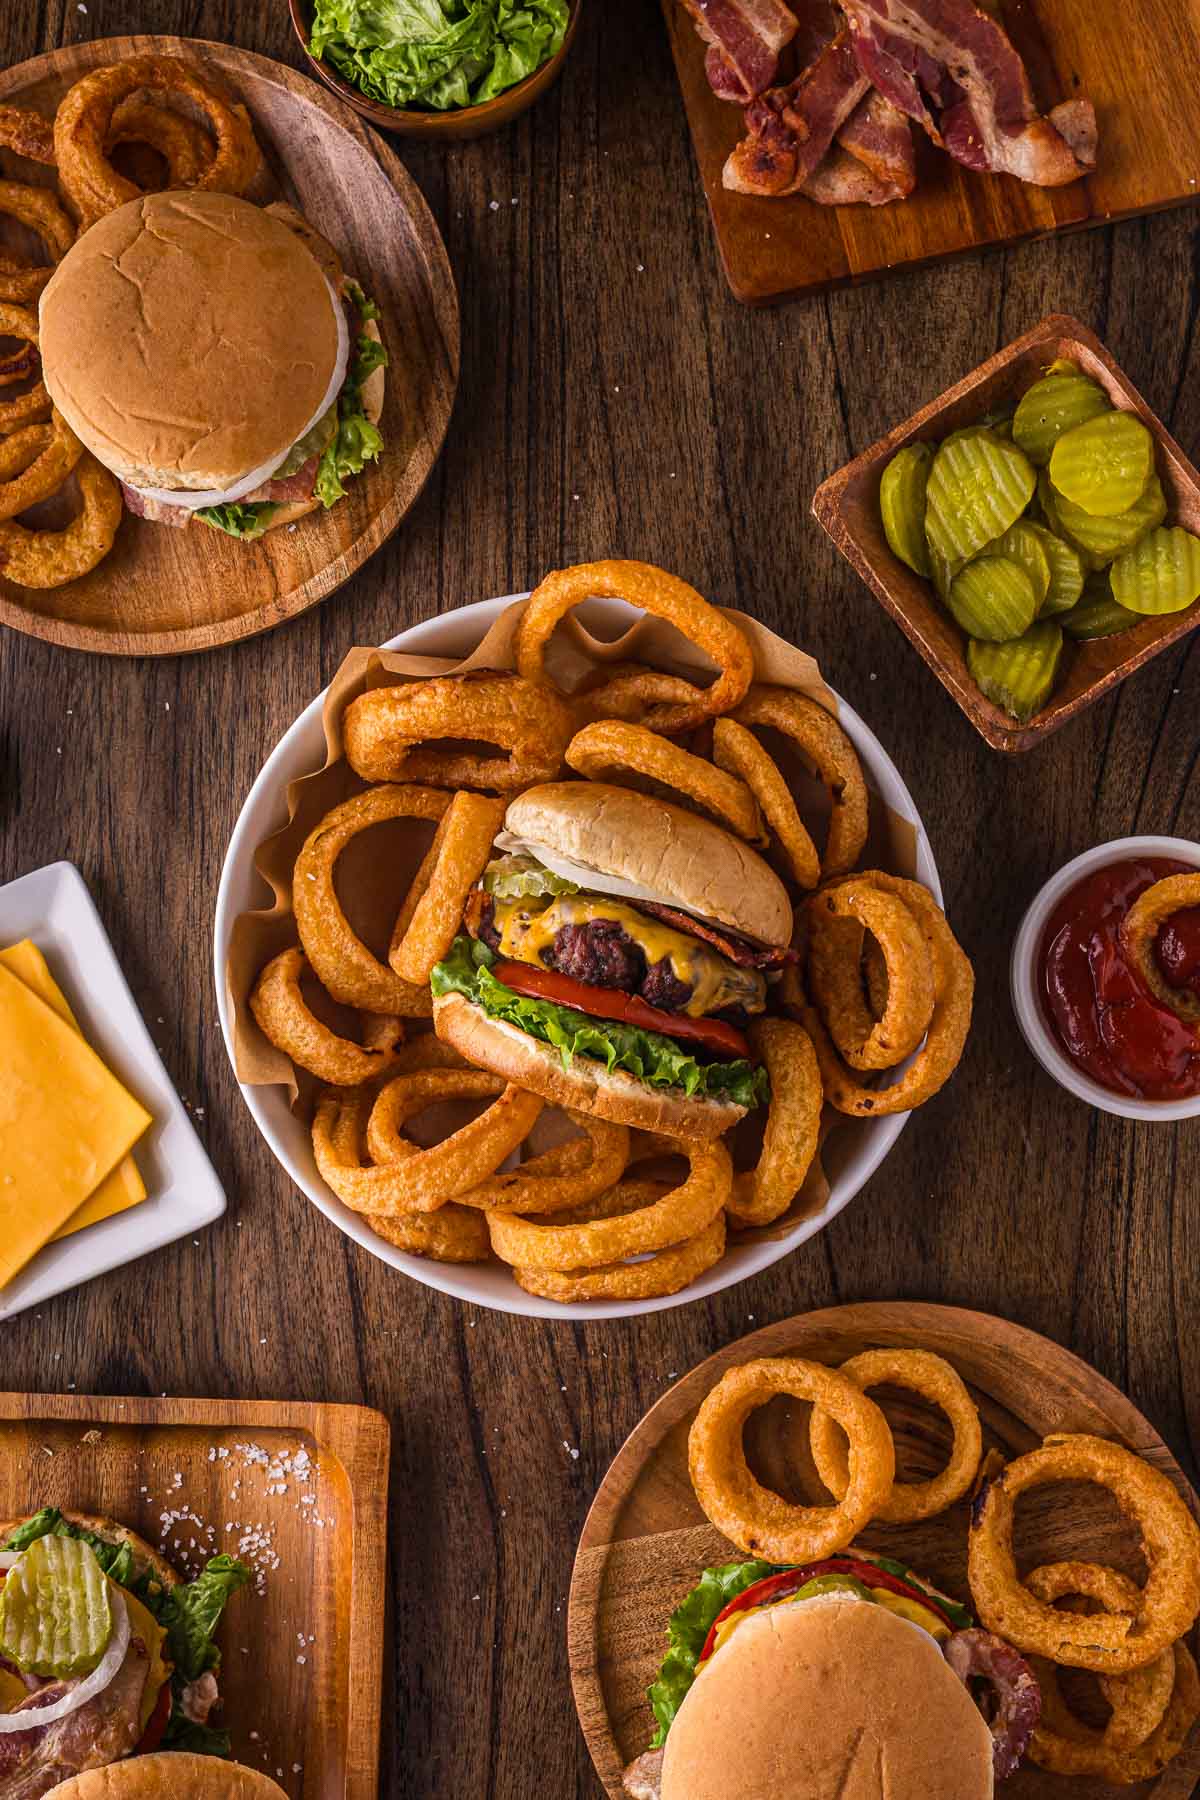
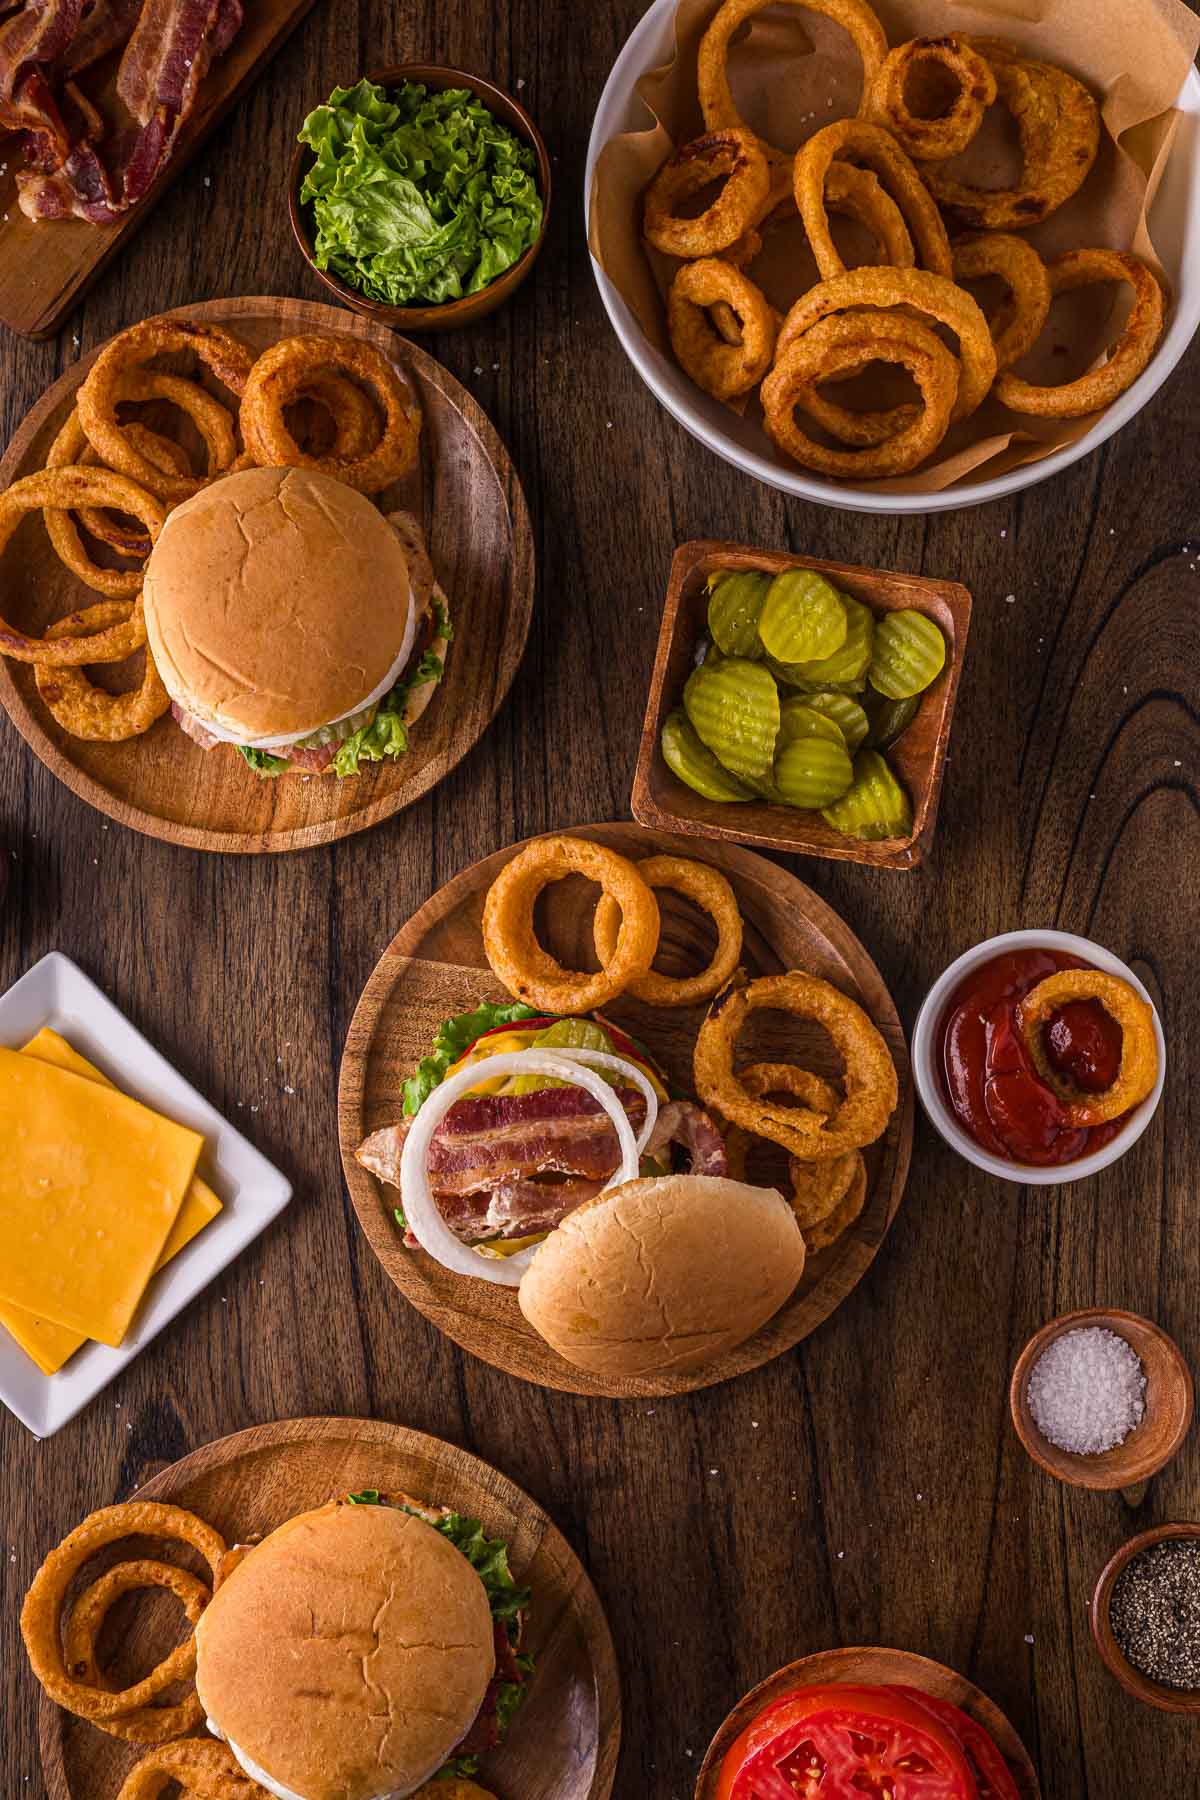
🍽️ What to Serve with Classic Bacon Cheeseburger
- Classic thin-cut or thick steak fries: The salt and crunch are the contrast that cut through the richness of the double-bacon build. This combination is the reason diners exist.
- Vinegar-forward coleslaw: A sharp, tangy slaw works great on the side or tucked directly inside the bun above the pickles. The acid hits differently than the pickles alone and adds a crunch layer that holds up through the whole burger.
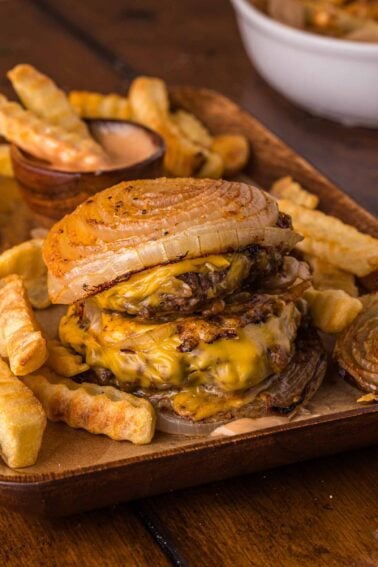
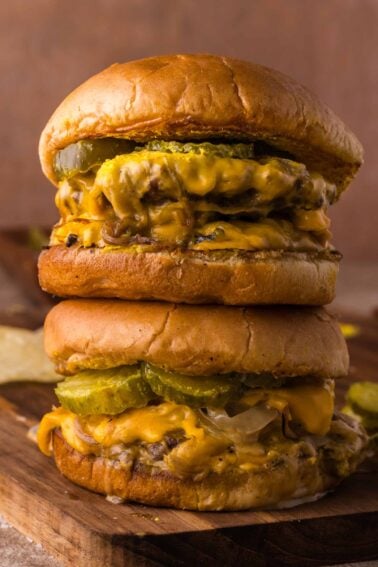
- More burgers off the same grill: Big Mac Sliders and French Onion Burgers are natural table companions. You can run all three off the same grill at the same time without adjusting your setup.
🧊 Leftovers and Storage
- Refrigerate cooked patties in an airtight container for up to 3 days. Keep toppings and buns stored separately — assembled burgers don’t survive the fridge.
- Reheat in a skillet over medium heat with a splash of water and a lid for 2–3 minutes per side until warmed through. The steam heats the interior without drying out the patty. Microwave works but the crust pays the price.
- Cooked bacon keeps separately in the fridge for up to 5 days. Re-crisp in a dry skillet for 1–2 minutes before assembling.
- Freeze uncooked patties for up to 3 months with parchment between each one. Thaw overnight in the fridge before grilling.
Have you tried this recipe? Do us a favor and rate the recipe card with the ⭐ ⭐ ⭐ ⭐ ⭐ and drop a comment to help out the next reader.
Classic Bacon Cheeseburger
Ingredients
For the Patties
- 2 lbs ground beef 80/20
- 1 tsp kosher salt
- 1/2 tsp coarse black pepper
For the Build
- 8 slices thick-cut bacon
- 4 slices American cheese
- 4 soft hamburger buns
- 4 tbsp mayonnaise
- 12 dill pickle slices
- 4 leaves green leaf lettuce
- 1 medium tomato sliced thin
- 1/2 white onion sliced thin or in rings
Instructions
Cook the Bacon
- Cook bacon in a skillet over medium heat or on a wire rack in a 400°F oven until crisp, about 8-10 minutes. Drain on paper towels and set aside.

Preheat the Grill
- Preheat grill to medium-high (around 400-450°F). Carefully clean and oil the grates with a folded oil-dipped paper towel and tongs.
Form the Patties
- Divide beef into 4 portions (about 8 oz each). Handle minimally. Press each into a 3/4-inch thick patty. Press a thumb indent into the center of each.
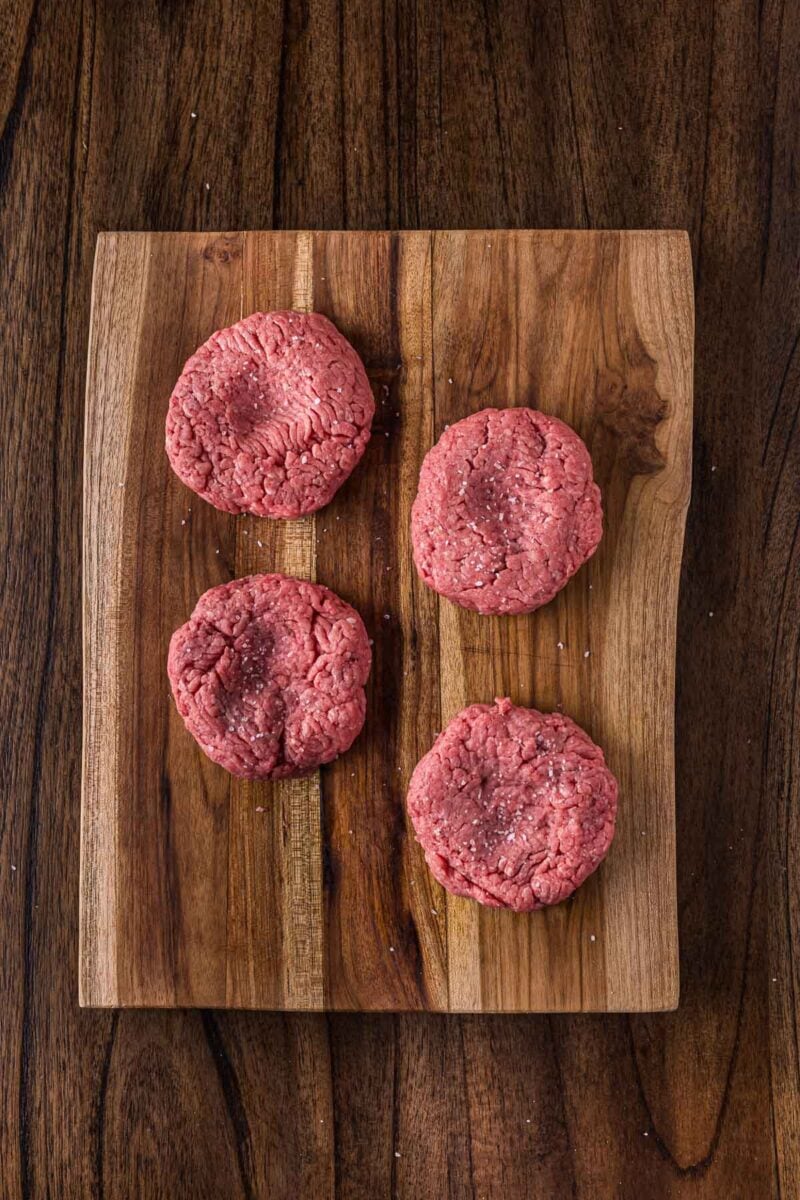
Season
- Season both sides generously with kosher salt and black pepper immediately before grilling.
First Side
- Place patties over direct heat. Cook undisturbed for 4-5 minutes until the crust sets and the patty releases cleanly from the grate.
Flip and Finish
- Flip once. Cook 3-4 minutes more. Add American cheese in the last 60-90 seconds and close the lid to melt. Pull at 160°F internal temp, or youre desired tamp.

Toast the Buns
- Toast bun halves cut-side down for 60-90 seconds until lightly golden.
Assemble
- Spread 1 tbsp mayo on both cut sides of each bun. Layer: lettuce, tomato, onion, patty with cheese, two strips of bacon, dill pickles. Cap and serve immediately.
Notes
- Season patties right before grilling, not in advance. Salting early draws out moisture. – The thumb indent prevents doming. Do not skip it.
- Refrigerate cooked patties up to 3 days. Reheat in a covered skillet with a splash of water.
- Cooked bacon keeps separately for up to 5 days in the refrigerator.
Nutrition
Bookmark this recipe now!
Quick Summary
A classic bacon cheeseburger is 80/20 beef, thick-cut bacon, melted American, and the right condiment stack on a soft bun. Form the patties with a thumb indent, season right before they hit the grill, and cook undisturbed over high heat until the crust sets. Browse more burger recipes worth building a cookout around.
❓ FAQs
80/20 ground chuck. The 20% fat is the juice and the crust. 90/10 works in a pinch but the patty will be noticeably drier and the exterior won’t develop the same sear.
Press a thumb indent into the center of each raw patty before seasoning. The indent compensates for the way ground beef contracts as it cooks, so the patty cooks flat instead of doming in the middle.
160°F is USDA safe for ground beef. At that temp the patty will feel firm with just a slight give in the center. Pull it there and it won’t be dry — 80/20 beef has enough fat to stay juicy at 160°F.
Form patties up to 24 hours ahead, refrigerated and covered. Cook the bacon ahead too and store separately. Don’t assemble until ready to serve.
Add the cheese in the last 60–90 seconds and close the grill lid immediately. The trapped heat melts it evenly without scorching the crust.