Let’s be honest – we’ve all bitten into a burger that looked amazing but turned out to be a disappointment. Either bone dry and dense as a hockey puck, or worse, suspiciously pink and undercooked in the center.
After testing hundreds of burger recipes since 2013, the difference between a juicy, perfect burger and a disappointing hockey puck comes down to one thing: temperature control. Master this, and we guarantee consistently impressive results every time.
While most home cooks obsess over toppings and seasonings, pros know temperature is what makes or breaks a burger. Get it right, and your guests will always ask for your secret.
Table of Contents
- Burger Temperature Chart
- Best Meat Blends for Juicy Results
- Meat Temperature Before Cooking
- Why Starting Temperature Matters
- Cold Meat, Hot Grill: The Essential Rule
- The Science Behind Fat Melting Points
- Pro Tips for Pre-Cooking Temperature Control
- Food Safety Considerations
- USDA Guidelines: The 160°F Recommendation
- When You Can Cook Below 160°F
- Special Considerations for Different Meats
- When to Absolutely Follow the 160°F Rule
- Part 4: Cooking Methods & Temperature Control
- Direct Heat Grilling
- Cast Iron/Griddle Cooking
- Two-Zone Fire Setup for Thick Burgers
- Reverse Sear Method for Precise Temperature
- Smash Burger Technique and Temperature
- Part 5: Tools & Techniques for Perfect Temperature
- Types of Meat Thermometers
- The “Touch Test” Method (With Limitations)
- Carryover Cooking and Resting Periods
- How to Adjust for Different Burger Thicknesses
- Common Temperature-Related Problems and Solutions
- Part 6: Advanced Temperature Techniques
- Salt Timing and Its Effect on Moisture Retention
- Adding Fat to Leaner Meats for Temperature Forgiveness
- Stuffed Burger Temperature Considerations
- Burger Temp Myths Busted
- Myth #1: Color Is a Reliable Indicator of Doneness
- Myth #2: Pressing Burgers Makes Them Cook Faster
- Myth #3: You Can’t Get Juicy Well-Done Burgers
- Final Tips for Temperature Mastery
- Perfect Beef Burgers Recipe
Burger Temperature Chart
Here’s the temperature cheat sheet you’ll want to bookmark and reference every time you make burgers:
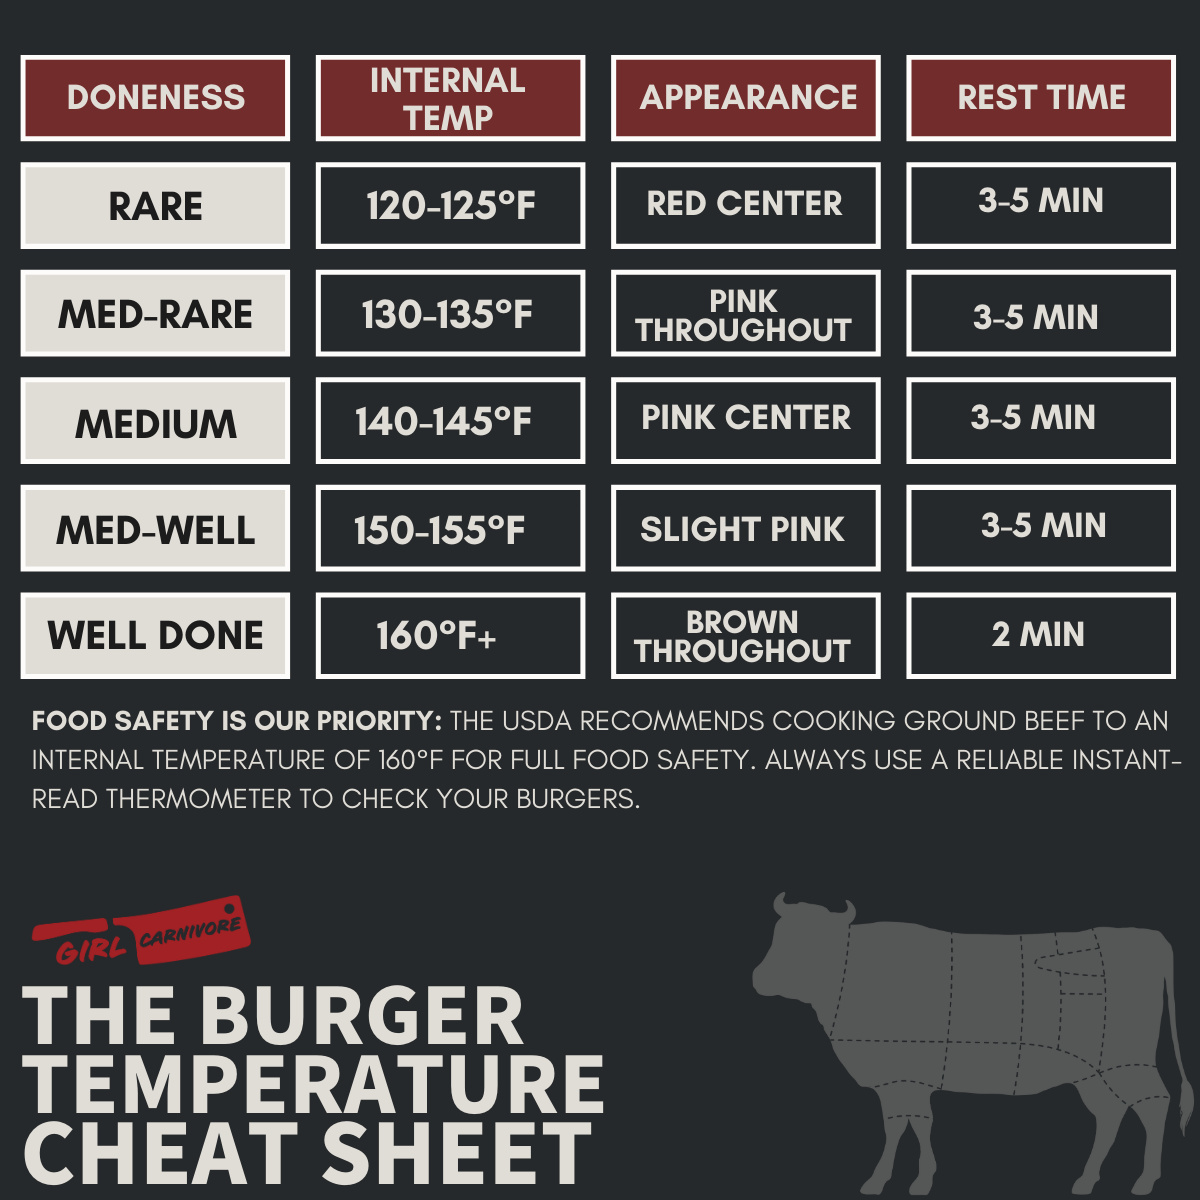
Remember: Always account for carryover cooking. Burgers will typically rise 5-10°F after being removed from heat, depending on thickness.
Join thousands of readers who trust us for expert tips, mouthwatering recipes, and step-by-step guides that help you to cook like a pro. Subscribe to Girl Carnivore here.
Rare (120-125°F)
Safety note: We only recommend rare burgers when using freshly ground, single-source meat you trust completely.
Characteristics:
- Cool, red center
- Very soft texture
- Pronounced beef flavor
- Feels barely set to the touch
Best suited for:
- Thick, high-quality custom grinds
- Burgers over 6oz
- Adventurous eaters who prioritize flavor
Medium-Rare (130-135°F)
Medium-rare is where the magic starts happening. The proteins have begun to set, but the burger remains incredibly juicy.
Characteristics:
- Pink throughout
- Warm center
- Very juicy
- Tender but not mushy
Best suited for:
- 80/20 blends
- Gourmet and steakhouse-style burgers
- 4-8oz patties
- Those who value maximum juiciness
Join thousands of readers who trust us for expert tips, mouthwatering recipes, and step-by-step guides that help you to cook like a pro. Subscribe to Girl Carnivore here.
Medium (140-145°F)
We consider medium the sweet spot that balances safety and flavor. The fat has properly rendered, creating a juicy burger with good structure.
Characteristics:
- Pink center with more brown toward edges
- Hot throughout
- Juicy with clear meat juices
- Firm but not tough
Best suited for:
- Standard backyard burgers
- First-time burger makers
- Most 80/20 ground chuck applications
- Family cookouts where preferences vary
Medium-Well (150-155°F)
Medium-well burgers have just a hint of pink and work well for those who are squeamish about pink centers but don’t want a dry burger.
Characteristics:
- Mostly brown with slight pink center
- Hot throughout
- Less juicy but not dry
- Firmer texture
Best suited for:
- Those who prefer less pink
- Commercial ground beef of unknown origin
- Leaner grinds with added fat
- Burgers with very moist toppings
Well-Done (160°F+)
Well-done doesn’t have to mean dry and flavorless. With the right technique, even fully cooked burgers can remain juicy.
Characteristics:
- Brown throughout
- No pink visible
- More firm texture
- Less visible juice
Best suited for:
- Pregnant women, elderly, or immunocompromised individuals
- When using conventional supermarket ground beef
- When food safety is the top priority
- Situations where you can add moisture through toppings and sauces
Pro tip: If cooking to well-done, consider adding butter, bacon fat, or other fat sources to your ground beef before forming patties.
Best Meat Blends for Juicy Results
Before we talk temperature, a quick word on meat selection since it affects how your burger responds to heat.
80/20: The Gold Standard
The 80/20 ratio (80% lean meat, 20% fat) is the sweet spot for most burger applications. This gives you enough fat for flavor and juiciness while preventing excessive shrinkage and flare-ups.
When cooking to medium or medium-rare, 80/20 ground chuck is forgiving enough to handle a slight overcook while providing maximal flavor.
When to Go Leaner or Fattier
70/30 or 75/25 blends work exceptionally well for:
- Smash burgers (the higher fat creates a better crust)
- Well-done burgers (extra fat compensates for longer cooking)
- Outdoor grilling (some fat will render out during cooking)
85/15 or 90/10 blends are better suited for:
- Turkey or chicken burgers (adding fat is essential here, and we find butter works best)
- Situations where you need less shrinkage
- Specific dietary needs
The best burger we’ve ever tasted was a 60/40 American wagyu burger from Black Hawk Farms.
Custom Blends for Temperature Mastery
For next-level burger temperature control, consider custom grinds. A mix of chuck, brisket, and short rib creates a burger with varied fat distribution that stays juicy across a wider temperature range.
Check out our guide for grinding your own burger meat here
Meat Temperature Before Cooking
The path to perfect burger temperature starts long before your patty hits the heat.
Why Starting Temperature Matters
Ground beef that starts at room temperature will cook unevenly, with exterior fat melting too quickly before the center reaches proper doneness. This creates the dreaded “bulge” in the middle of burgers and uneven cooking.
Cold Meat, Hot Grill: The Essential Rule
Keep your ground beef refrigerated until you’re ready to form patties, and keep those patties cold until the exact moment they hit the cooking surface.
We’re not being dramatic when we say every minute your meat spends at room temperature degrades your final result.
The Science Behind Fat Melting Points
Beef fat begins softening around 80°F and starts actively melting between 90-100°F. Once melted, it separates from the meat proteins, leading to dry burgers that shrink excessively.
When you start with cold meat (around a steady 38°F from your refrigerator), you create a buffer that allows for proper cooking before the fat fully renders out.
Pro Tips for Pre-Cooking Temperature Control
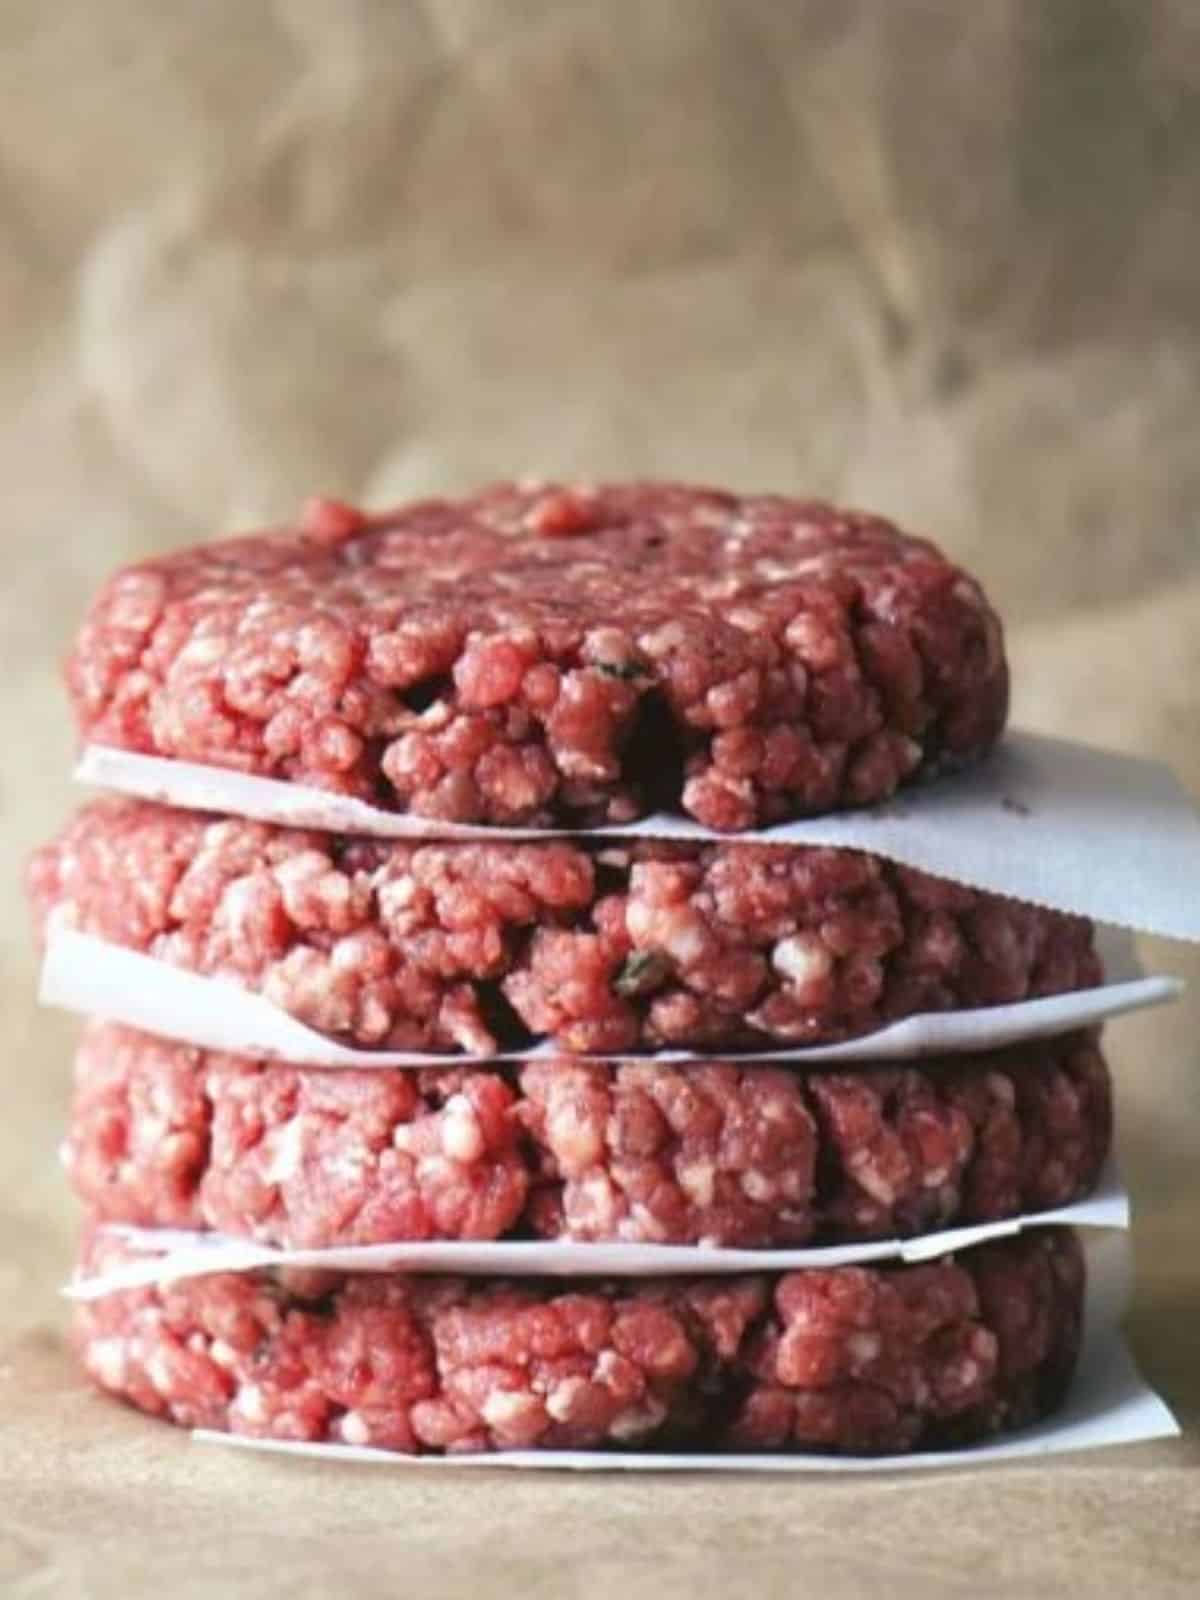
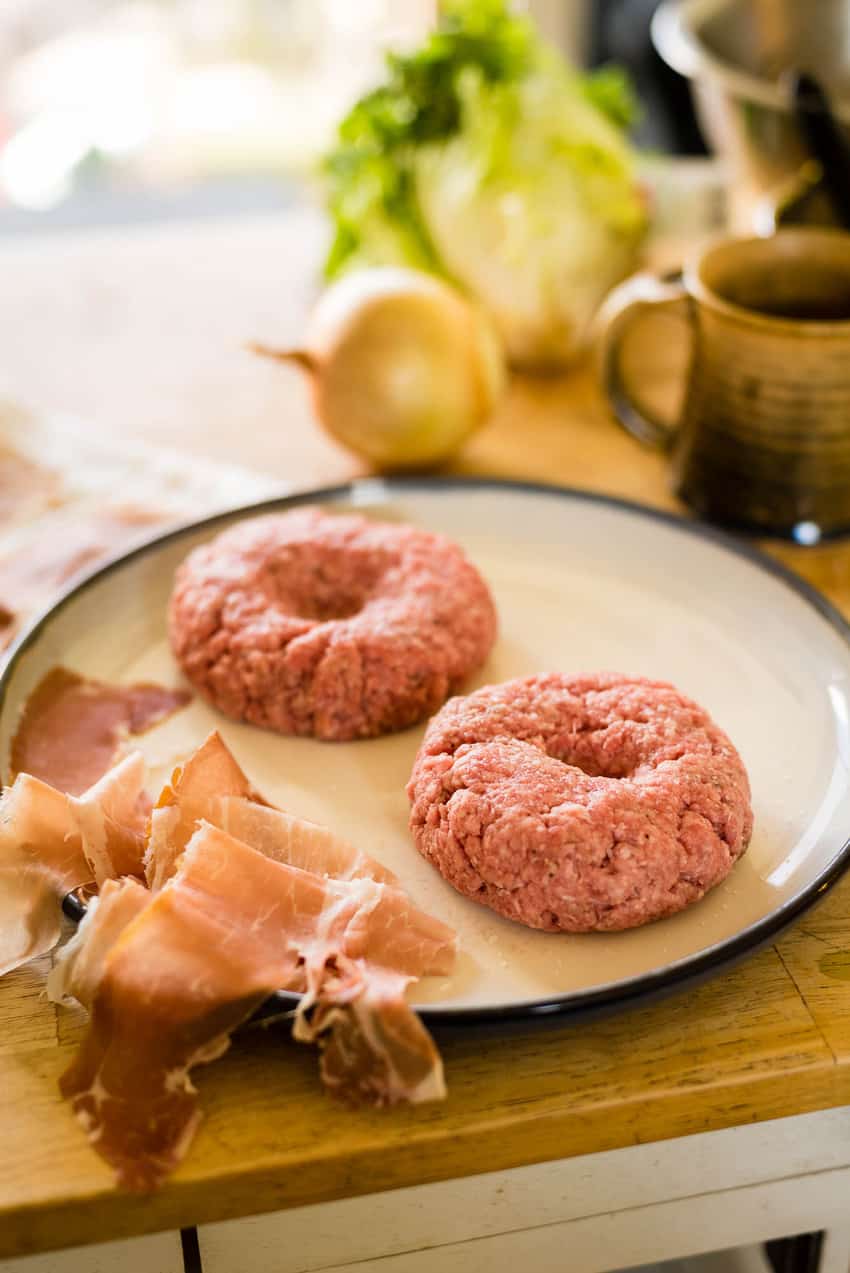
- Form patties and place them on a parchment-lined sheet pan in the refrigerator for 30 minutes before cooking
- For thick burgers, make a slight dimple in the center with your thumb to prevent the “bulge”
- Run your hands under cold water before handling meat to prevent transferring body heat
- Consider chilling your burger press or spatula if you’ll be using one to form patties
- Never leave ground meat at room temperature for more than 20 minutes
Food Safety Considerations
Temperature isn’t just about flavor and texture – it’s about safety.
USDA Guidelines: The 160°F Recommendation
The USDA recommends cooking ground beef to 160°F (well-done) to eliminate potential harmful bacteria. Unlike whole cuts where bacteria remain on the surface, ground beef can have bacteria distributed throughout.
This guideline is conservative and designed for maximum safety regardless of meat source or handling.
When You Can Cook Below 160°F
If you choose to cook burgers below the recommended 160°F, here’s what you need to know:
- Source quality matters enormously: Know your butcher, or grind your own meat from whole cuts
- Freshness is critical: Use immediately after grinding or purchasing from a trusted source
- Cross-contamination risk increases: Be vigilant about kitchen hygiene
- Higher-risk individuals should stick to 160°F: This includes pregnant women, young children, elderly people, and anyone who is immunocompromised
Special Considerations for Different Meats
- Ground Beef: The standard 160°F recommendation applies, though many culinary professionals cook to lower temperatures with high-quality meat.
- Ground Turkey/Chicken: Always cook to 165°F minimum. Poultry carries different bacteria risks and must be fully cooked. No exceptions.
- Ground Lamb: Similar to beef, 160°F is the USDA recommendation, though 145-155°F is common in culinary practice with quality meat.
- Plant-Based Burgers: Follow package directions, but most need to reach about 165°F for proper texture development.
When to Absolutely Follow the 160°F Rule
Never take chances with temperature when:
- Serving burgers at large gatherings where you don’t know everyone’s health status
- Using pre-packaged ground beef from conventional supermarkets
- Cooking for higher-risk individuals
- You’re uncertain about meat handling or storage history
Part 4: Cooking Methods & Temperature Control
Your cooking method dramatically affects how you’ll manage burger temperature.
Direct Heat Grilling
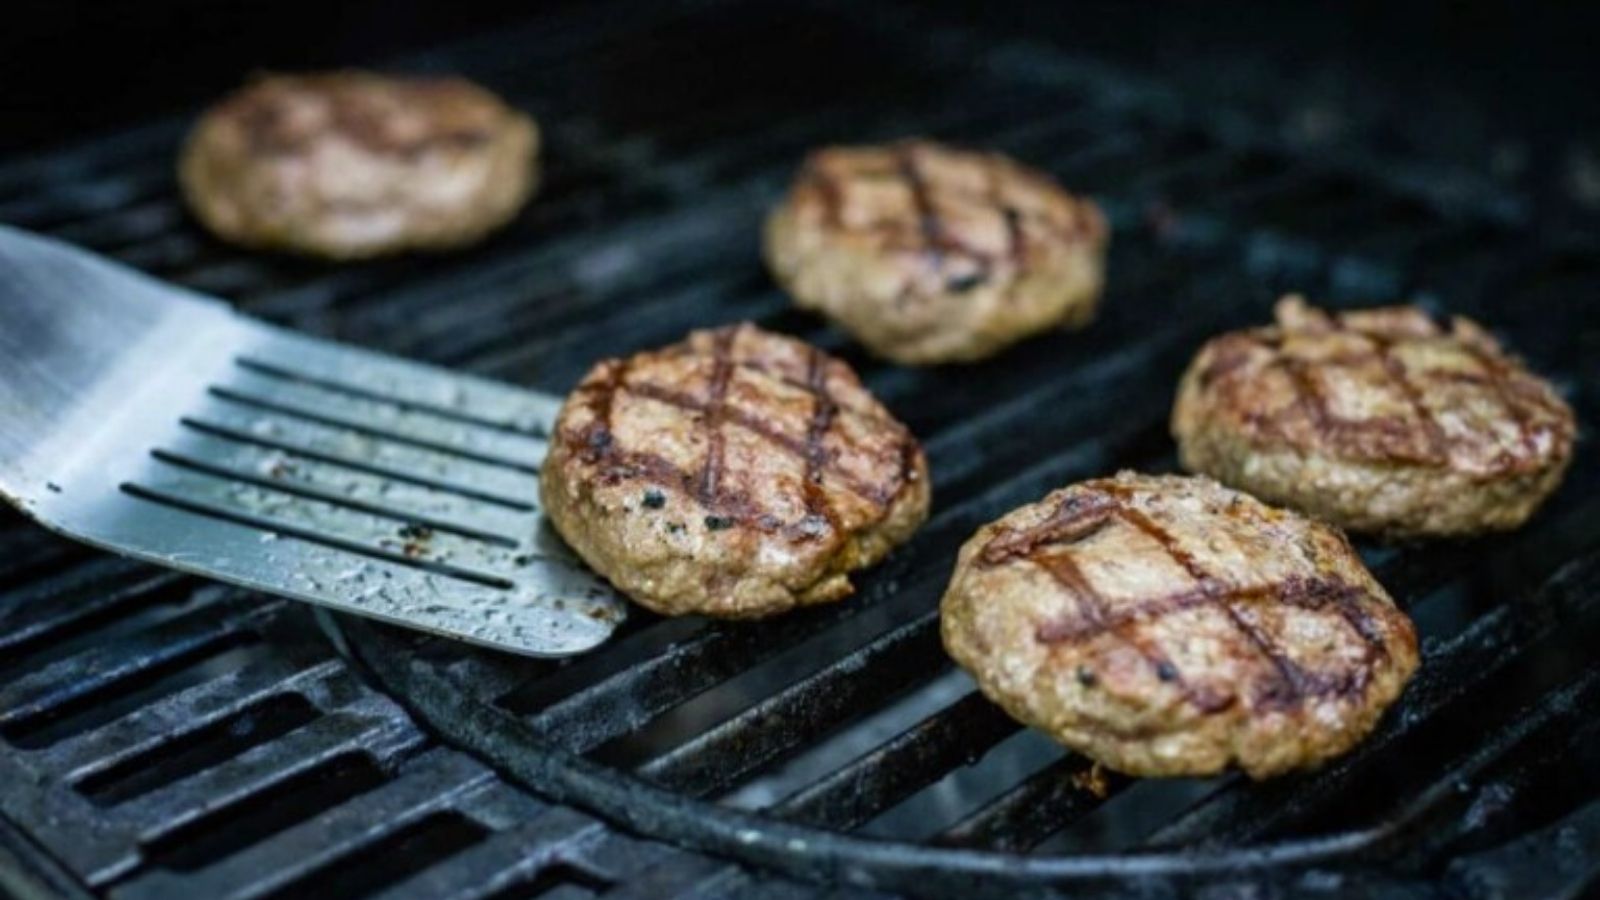
Target grill temperature: 400-450°F
Managing grill temperature is crucial for perfect burgers. Too hot, and you’ll burn the outside before the inside cooks. Too cool, and you’ll end up with gray, steamed meat.
For gas grills:
- Preheat for 10-15 minutes with the lid closed
- Create temperature zones by setting different burners to different levels
- Keep a cool zone for temperature management
For charcoal grills:
- Allow coals to develop white ash before cooking
- Set up a two-zone fire (see below)
- Adjust air vents to control the temperature
Temperature monitoring:
- Use an infrared thermometer to check grill surface temperature
- Don’t rely on the built-in thermometer (they’re notoriously inaccurate)
- Check patty temperature frequently, especially as you approach target temps
Cast Iron/Griddle Cooking
Target surface temperature: 375-400°F
Cast iron and flat top griddles provide consistent, even heat that’s perfect for burger temperature management.
Temperature tips:
- Preheat for at least 5 minutes over medium-high heat
- Test the surface by flicking a few drops of water – they should dance, not instantly evaporate
- For cast iron, use an infrared thermometer to verify surface temperature
- Adjust heat as needed during cooking
Two-Zone Fire Setup for Thick Burgers
For burgers thicker than ¾ inch, a two-zone fire gives you greater temperature control:
- Create a hot zone for searing
- Create a cooler zone for finishing cooking
This method prevents the dreaded “black and blue” burger (burnt outside, raw inside) by allowing you to sear first, then finish with gentler heat.
How to set it up:
- Gas grill: Leave one or two burners off
- Charcoal grill: Bank all coals to one side
- Start on the hot side for 1-2 minutes per side
- Move to the cooler side and close the lid to finish cooking
See our full guide for direct and indirect heat set up here.
Reverse Sear Method for Precise Temperature
For the ultimate temperature control on thick burgers (1+ inch), reverse searing is unbeatable:
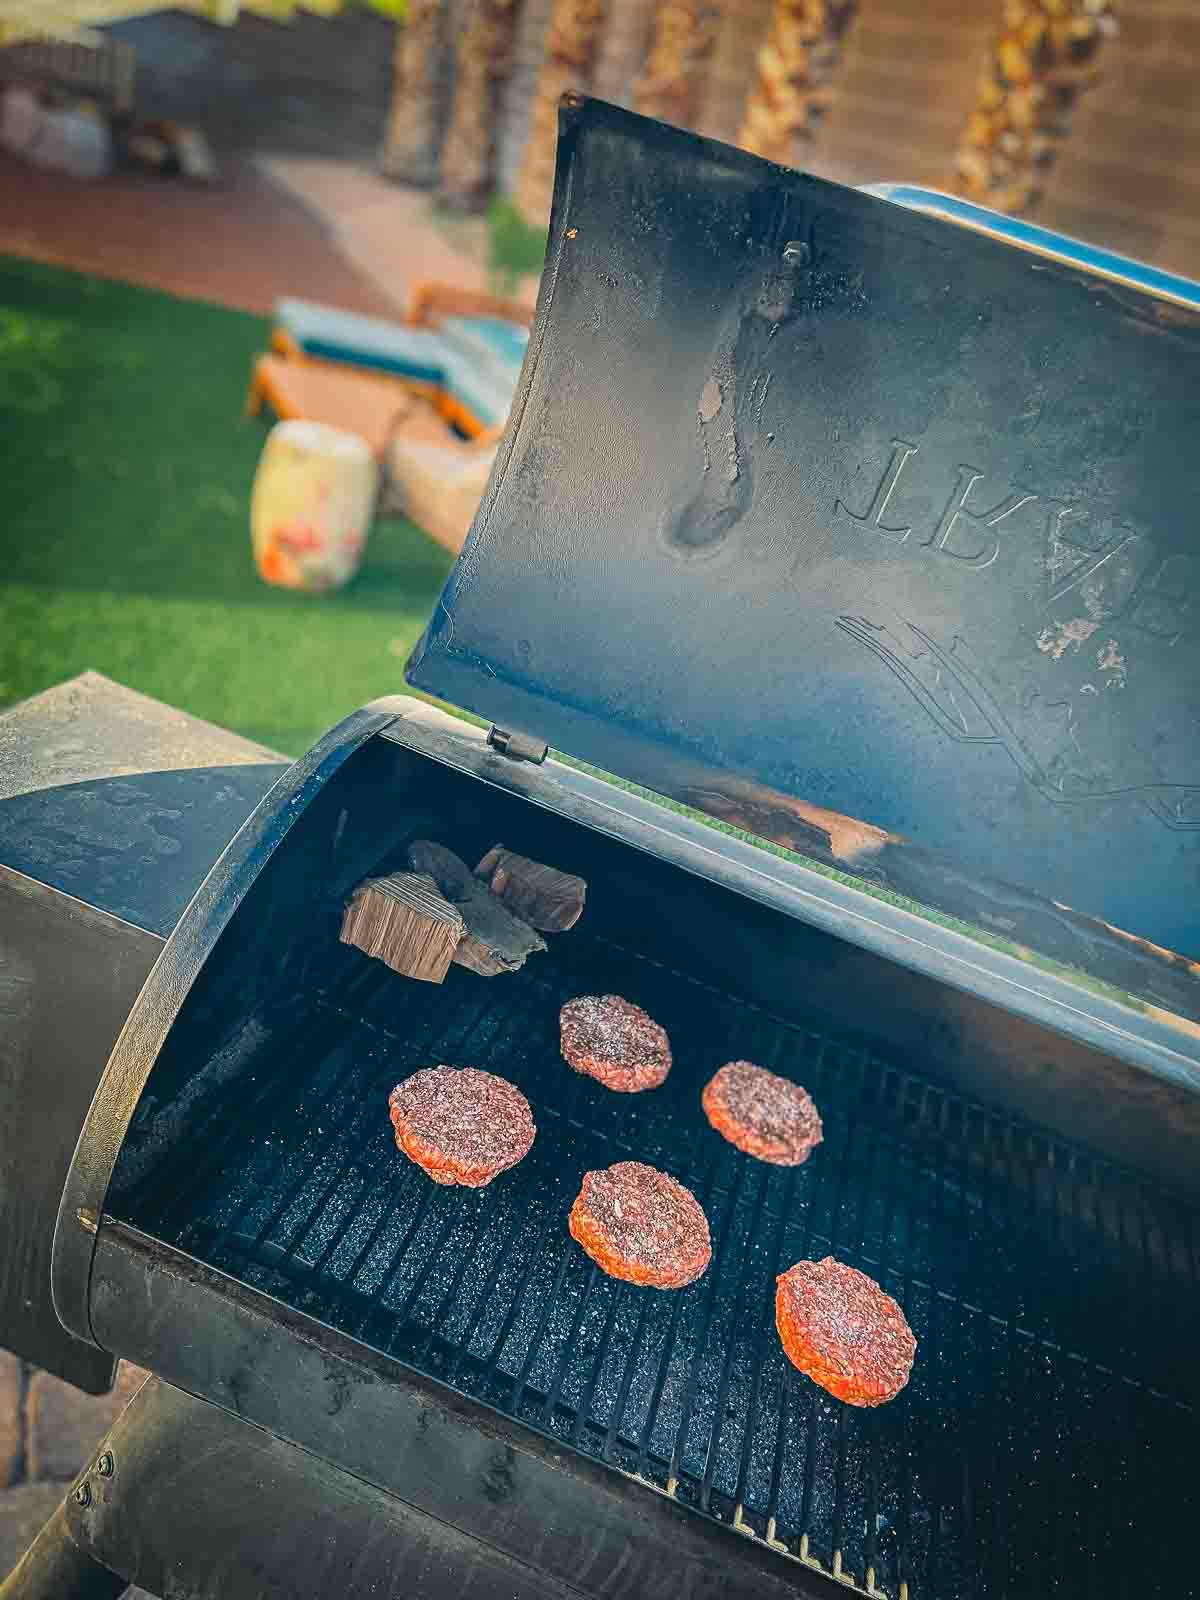
- Start burgers on the cool zone (250-300°F) until they reach about 10-15°F below target temperature
- Finish with a quick sear on the hot zone
This method provides the most even cooking and precise temperature control.
We love adding Hickory wood chips or Jack Daniel’s Wood chips to the fire when using this method. The slow initial cooking allows smoke flavor to penetrate.
Smash Burger Technique and Temperature
Smash burgers follow different temperature rules:
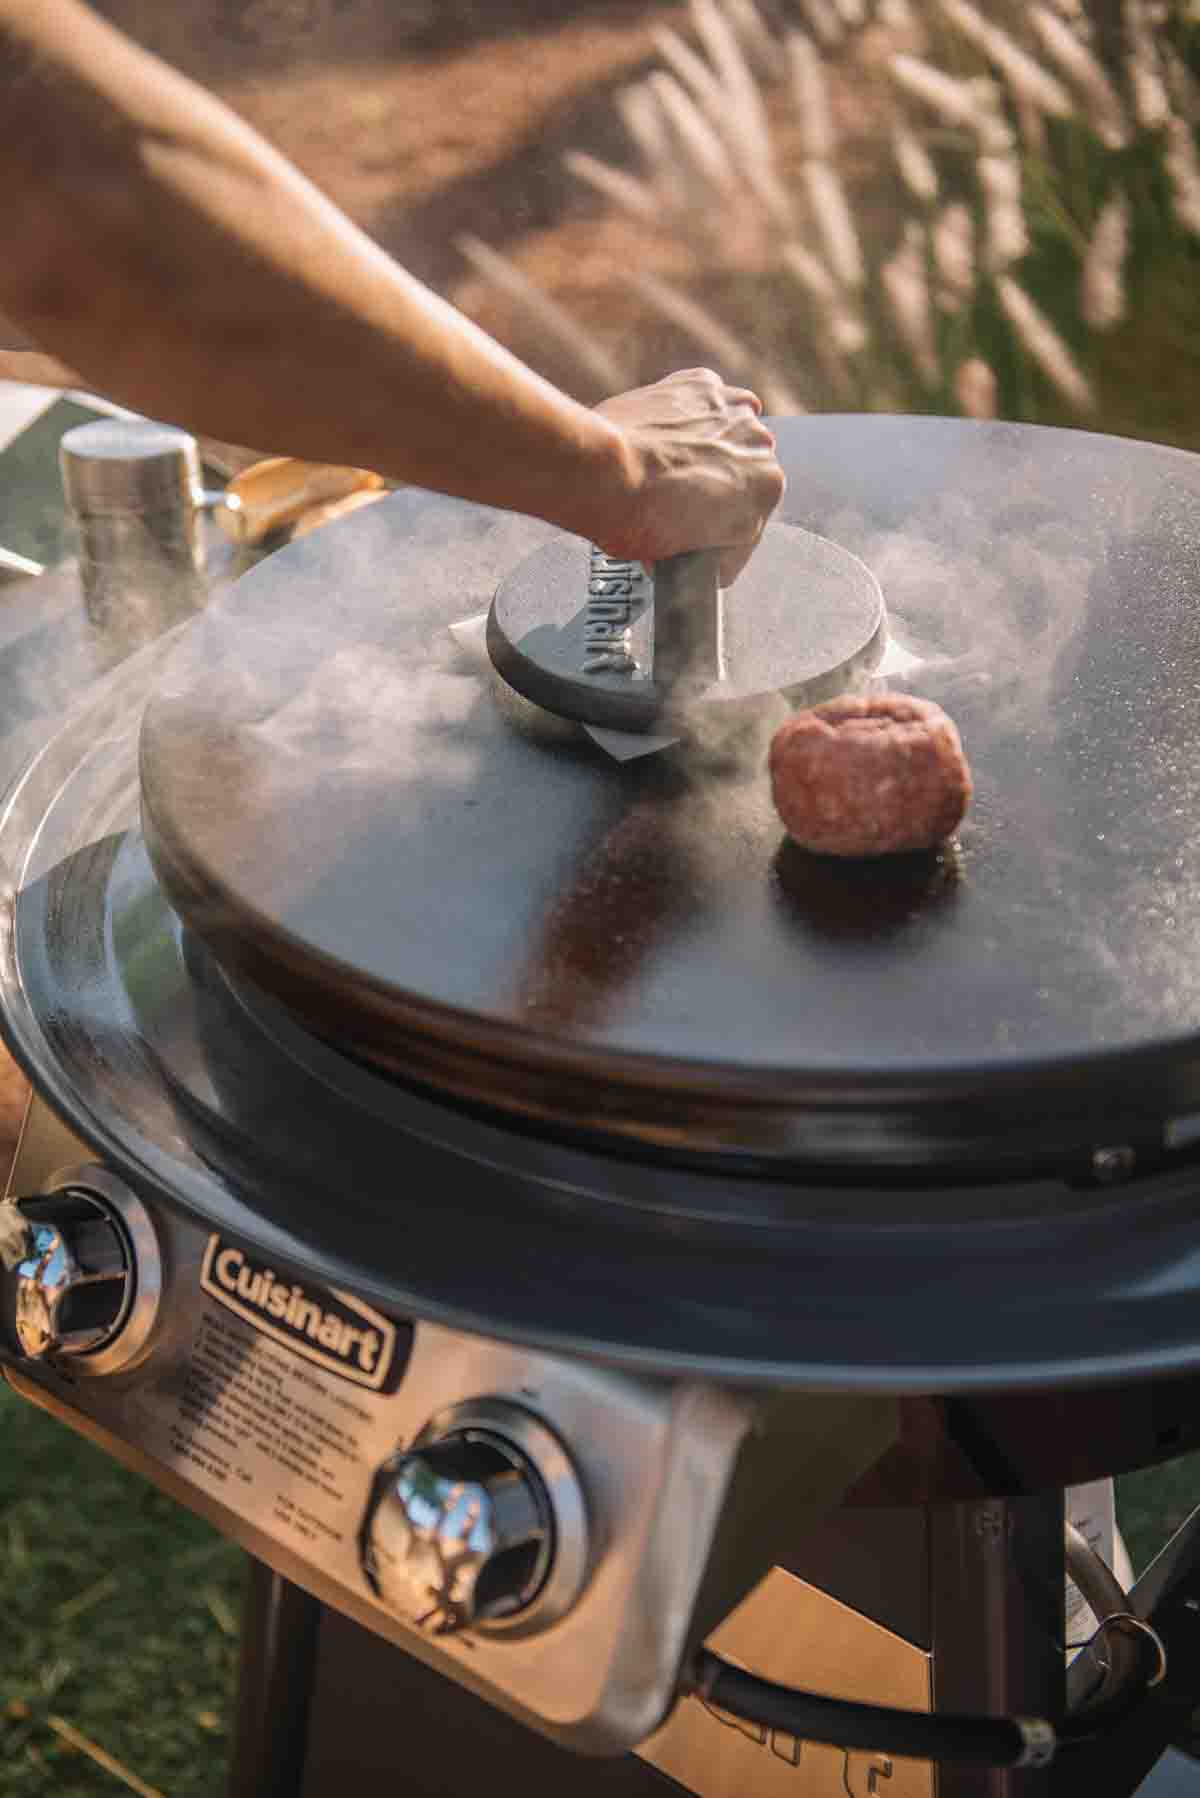
- Start with a ripping hot surface (450-500°F)
- Use 2-3oz balls of meat (never pre-formed patties)
- Smash immediately after placing on the hot surface
- Flip only once when the edges are crispy (about 2 minutes)
- Add cheese immediately after flipping
- Cook the second side covered, if you have a dome, for about 1 minute
- Because these are so thin, its almost impossible to get an accurate temperature. Make sure you cook them until they are crispy.
Part 5: Tools & Techniques for Perfect Temperature
The right tools make temperature mastery much easier.
Types of Meat Thermometers
Instant-read digital thermometers: Our top recommendation for burgers. Look for:
- Fast reading time (under 3 seconds)
- Thin probe tip
- Accuracy to within 1°F
- Water-resistant design
We recommend the ThermoPop for excellent performance at a reasonable price, or the Thermapen ONE for the absolute best.
Leave-in thermometers: Less useful for burgers due to their thickness, but good for tracking ambient grill temperature.
Infrared thermometers: Excellent for checking grill or pan surface temperatures.
The “Touch Test” Method (With Limitations)
Some cooks use the touch method to gauge doneness:
- Rare: Feels like the base of your thumb when your thumb and index finger are relaxed
- Medium-rare: Like the base of your thumb when thumb and index finger are lightly touching
- Medium: Like the base of your thumb when thumb and middle finger touch
- Well-done: Like the base of your thumb when thumb and pinky touch
Limitations:
- Highly subjective and varies by hand size and individual anatomy
- Becomes less reliable with different meat blends and fat contents
- Temperature verification is still recommended
Carryover Cooking and Resting Periods
Burgers continue cooking after removal from heat. This carryover cooking typically raises internal temperature by:
- 5°F for thin burgers (under ½ inch)
- 5-10°F for medium thickness (½-¾ inch)
- 10°F or more for very thick burgers (1+ inch)
Optimal resting periods:
- Thin burgers (smash style): No rest needed, serve immediately with pickles (mandatory)
- Medium thickness: 2-3 minutes
- Thick burgers: 3-5 minutes
Resting allows juices to redistribute and carryover cooking to complete.
How to Adjust for Different Burger Thicknesses
Thin patties (¼-⅓ inch):
- Cook hot and fast
- Flip once
- Use direct heat only
- Pull slightly earlier than target temp
Medium patties (½-¾ inch):
- Use medium-high heat
- Flip as needed
- Pull 5°F below target temp
Thick patties (1+ inch):
- Use two-zone or reverse sear method
- Flip as needed
- Pull 10°F below target temp
- Longer rest time required
Common Temperature-Related Problems and Solutions
Problem: Center is still raw when outside is burn
Solution: Lower cooking temperature and use two-zone method
Problem: Burger temperature rises too quickly
Solution: Start with colder meat and lower cooking temperature
Problem: Cannot get accurate temperature reading
Solution: Remove the patty from the grill and insert thermometer from the side into the center of the patty
Problem: Uneven cooking with one side overcooked
Solution: Make sure you have even grill temperature and consistent patty thickness
Part 6: Advanced Temperature Techniques
Ready to elevate your burger game further? These pro-level temperature techniques will make you a true burger master.
Salt Timing and Its Effect on Moisture Retention
When you salt your burgers affects moisture retention and temperature performance:
Salt just before cooking (our preferred method):
- Liberally salt the outside of formed patties only
- Creates a better crust
- Maintains moisture inside the burger
- Allows for more precise temperature control
Salt mixed into meat:
- Starts breaking down proteins immediately
- Creates a springier, sausage-like texture
- Requires more careful temperature monitoring
- Can lead to moisture loss before cooking
Adding Fat to Leaner Meats for Temperature Forgiveness
Leaner meats (85/15 or leaner) have less room for temperature error. Add one of these per pound of lean meat:
- 1-2 tablespoons cold butter, cubed (our perseonal fav)
- 1-2 tablespoons bacon fat
- 1 tablespoon neutral oil like avocado oil
- 1-2 tablespoons beef bone marrow
This added fat creates a buffer that allows for slightly higher cooking temperatures without drying out.
Stuffed Burger Temperature Considerations
Stuffed burgers present unique temperature challenges:
- The filling insulates the center meat
- Different fillings require different cooking approaches
- Cheese fillings can create dangerously hot pockets
Key tips:
- Make patties thinner than regular burgers, 1/4 to 1/8″ thick (the thinner the better)
- Use the reverse sear method for even cooking
- Check the temperature in the meat portion, not the filling
- Pull from heat 10°F below target temperature
- Allow for a longer rest time (5-7 minutes minimum due to the heated fillings)
- Verify multiple spots reach safe temperatures
Burger Temp Myths Busted
Let’s clear up some common temperature misconceptions:
Myth #1: Color Is a Reliable Indicator of Doneness
The Truth: Color is an unreliable indicator of temperature and safety.
Factors that affect meat color regardless of temperature:
- Meat age and exposure to oxygen
- Animal diet
- Presence of certain additives
- pH level of the meat
Always use a thermometer rather than relying on color alone.
Myth #2: Pressing Burgers Makes Them Cook Faster
The Truth: Pressing burgers forces out juices and fat, resulting in dry, flavorless meat.
The only time pressing is appropriate:
- When making smash burgers (and only in the first 30 seconds)
- To test for doneness via feel (and only very gently)
Pressing does speed cooking marginally, but at a devastating cost to the quality of your burger.
Myth #3: You Can’t Get Juicy Well-Done Burgers
The Truth: Well-done doesn’t have to mean dry. With proper temperature management, even 160°F+ burgers can remain juicy:
- Start with higher fat content meat (70/30 or 75/25)
- Use the reverse sear method
- Cook more gently at lower temperatures
- Let rest properly before serving
Final Tips for Temperature Mastery
- Invest in a quality instant-read thermometer
- Start with cold meat and hot cooking surfaces
- Account for carryover cooking by pulling burgers 5-10°F before target temperature
- Match your cooking method to your burger thickness
- Practice, practice, practice – temperature sense comes with experience
Troubleshooting Guide
| Problem | Likely Cause | Solution |
|---|---|---|
| Burgers shrink too much | Too high cooking temp, too warm meat | Start colder, cook more gently |
| Dry despite correct temp | Over-handling, over-mixing, too low fat content | Handle meat minimally, form patties loosely, use higher fat ratio ground meat. |
| Raw center, burnt exterior | Too high heat | Wait for your coals to have an even glowing ember and to be almost completely ashed over before cooking. Use two-zone or reverse sear method |
| Inconsistent results | Inconsistent starting temperature | Keep everything in the fridge until cooking |
| Burgers stick to grill | Not hot enough when placing patties, didn’t clean your grill grates | Make sure the grill is properly preheated |
Have a burger temperature question we didn’t answer? Leave a comment below and we’ll help you solve it!
Have you tried this recipe? Do us a favor and rate the recipe card with the ⭐ ⭐ ⭐ ⭐ ⭐ and drop a comment to help out the next reader.
Perfect Beef Burgers
Ingredients
- 1.5 lbs 80/20 ground chuck kept cold until use
- Kosher salt
- Freshly ground black pepper
- 4 burger buns
- Desired toppings
Instructions
- Divide cold ground beef into 4 equal portions (about 6oz each)
- Gently form into patties about ¾-inch thick without overworking
- Press thumb gently in center to create a slight dimple
- Season exterior generously with salt and pepper
- Refrigerate formed patties for 20 minutes
- Preheat grill or cast iron to 400-450°F
- Cook patties 4-5 minutes on first side
- Flip and cook until internal temperature reaches:125°F for medium-rare (will rise to 130-135°F)135°F for medium (will rise to 140-145°F)150°F for medium-well (will rise to 155-160°F)160°F for well-done
- Rest burgers 3-5 minutes before serving
- Serve on toasted buns with desired toppings
Notes
Nutrition
Bookmark this recipe now!
