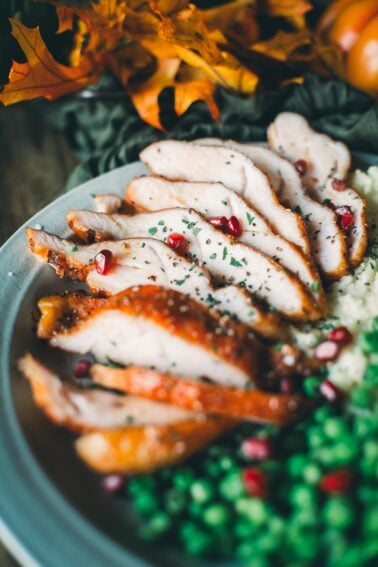
Achieving perfectly crispy chicken skin on a pellet grill can elevate your grilling experience to a whole new level. Whether you’re a seasoned grill master or a backyard BBQ enthusiast, there are several techniques to ensure your chicken comes out with irresistibly crunchy skin. From preheating your grill to finishing with a direct sear, these methods will help you master the art of crispy chicken skin.
Preheat the Pellet Grill for Optimal Crispiness

Before diving into cooking, it’s essential to preheat your pellet grill. I find that setting the temperature between 400-450°F allows the skin to start crisping up as soon as the chicken hits the grill. This initial burst of heat is crucial for rendering the fat beneath the skin, which contributes to a crispy texture. On my last grilling session with a Traeger grill, preheating made a noticeable difference in the overall crunch.
Remember, patience is key when preheating. Give your grill at least 15 minutes to reach the desired temperature. This not only ensures even cooking but also prevents the chicken from sticking to the grates. Investing this time up front sets the stage for perfectly crisped skin.
Pat the Chicken Skin Dry Before Grilling

One of the simplest yet most effective methods is to pat the chicken skin dry with paper towels. Moisture is the enemy of crispiness, so removing excess water from the skin helps achieve a better texture. I usually leave the chicken uncovered in the fridge for a few hours to air dry before grilling.
If you’re in a time crunch, drying the skin with paper towels right before cooking works well, too. Focus on thoroughly drying the surface to get the best results. This step has been recommended by many grilling enthusiasts, including those on the Foodies Group, and it truly makes a difference.
Utilize Baking Powder for Extra Crunch

Baking powder is a secret weapon for achieving crispy chicken skin. A light dusting of baking powder, mixed with your favorite spices, can significantly enhance the texture of the skin. The baking powder raises the pH level, which helps break down the proteins and encourages browning.
I’ve found that applying this mixture and letting it sit on the chicken for an hour before cooking yields the best results. Be sure to use aluminum-free baking powder to avoid any off-flavors. For more unconventional grilling tips, check out this article.
Cook Chicken at High Heat

Cooking chicken at high heat is crucial for rendering fat and achieving crispy skin. After preheating, maintain a grill temperature of around 425°F. This high heat allows the skin to cook quickly, preventing it from becoming soggy.
Be mindful of the cooking time, as overcooking can dry out the meat. I always use a meat thermometer to ensure the internal temperature reaches 165°F, ensuring the chicken is cooked through while keeping the skin crispy. For more detailed guidance on achieving crispy chicken skin, you might find this resource helpful.
Elevate the Chicken with a Cooling Rack

Using a cooling rack on the grill is a simple trick to enhance air circulation around the chicken. This elevation allows heat to circulate evenly, ensuring the skin crisps up from all sides. I place the rack directly on the grill grates, which also prevents the chicken from sticking.
This method works particularly well for whole chickens or larger cuts, as it ensures even cooking. It’s a handy technique that has consistently yielded great results in my own grilling adventures.
Finish with a Direct Sear for Maximum Crisp

For the ultimate crispy finish, I like to give the chicken a final direct sear. After the chicken is cooked through, transfer it to the hottest part of the grill for a quick sear. This step intensifies the crispiness of the skin and adds a delightful charred flavor.
Be careful not to leave the chicken on the direct heat for too long, as it can burn quickly. A minute or two per side is usually sufficient. This final touch ensures that your chicken not only tastes great but also looks visually appealing with a perfectly browned crust.
Hungry for more? Subscribe to our newsletter and become part of the world’s best meat community! From grilling tips to smoky secrets, we send you the best recipes, guides, and expert advice to master every cut.


