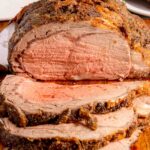
How to Carve a Bone-In Prime Rib
Step-by-step guide to carving a bone-in prime rib so you get clean, even slices and keep the show at the table stress-free.
Ingredients
- Bone-in prime rib roast
- Kitchen twine
Instructions
Separate the bones before roasting
- Stand the roast upright with the bones facing you.
- Slide your knife along the natural curve of the bones, staying tight to the bone to remove them cleanly.
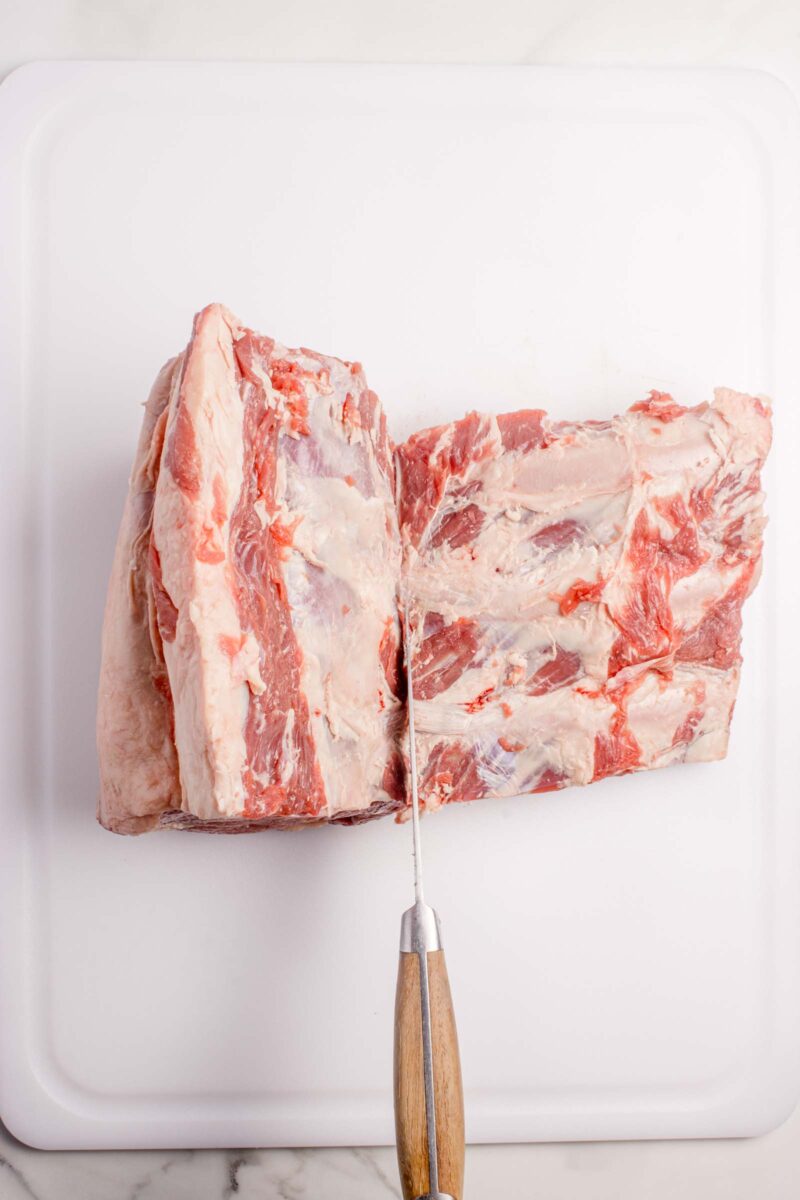
- Set the detached bone rack aside.
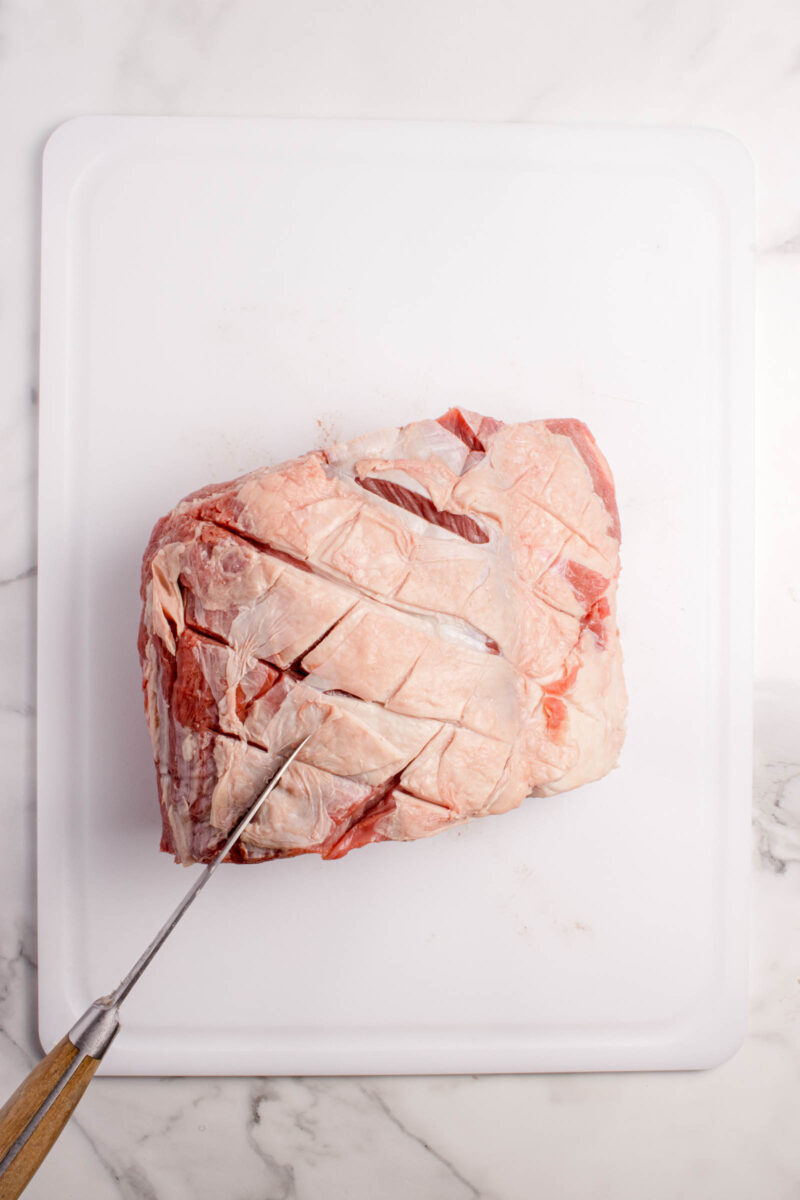
Score the fat cap so it renders properly
- Use the tip of your knife to make shallow crosshatch cuts across the fat cap. Cut only through the fat, not into the meat below.
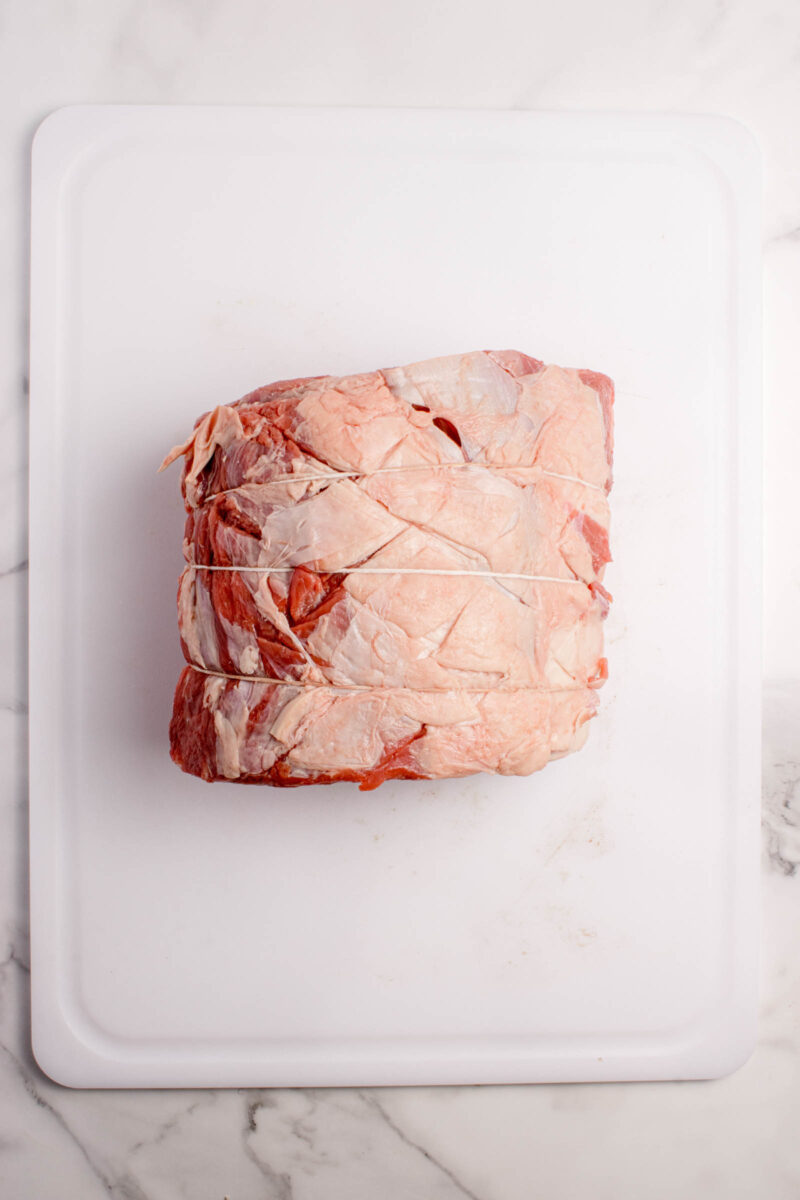
Tie the roast back onto the bones
- Position the bones under the roast in their original place.
- Use 3–4 pieces of kitchen twine to tie the roast and bones together snugly so the meat holds its shape during cooking.
Roast the prime rib and let it rest
- Roast the meat at 300°F until the center reaches your target temperature (120°F rare, 125°F medium-rare, 130°F medium). Tent loosely with foil and rest for 20–30 minutes so the juices redistribute.
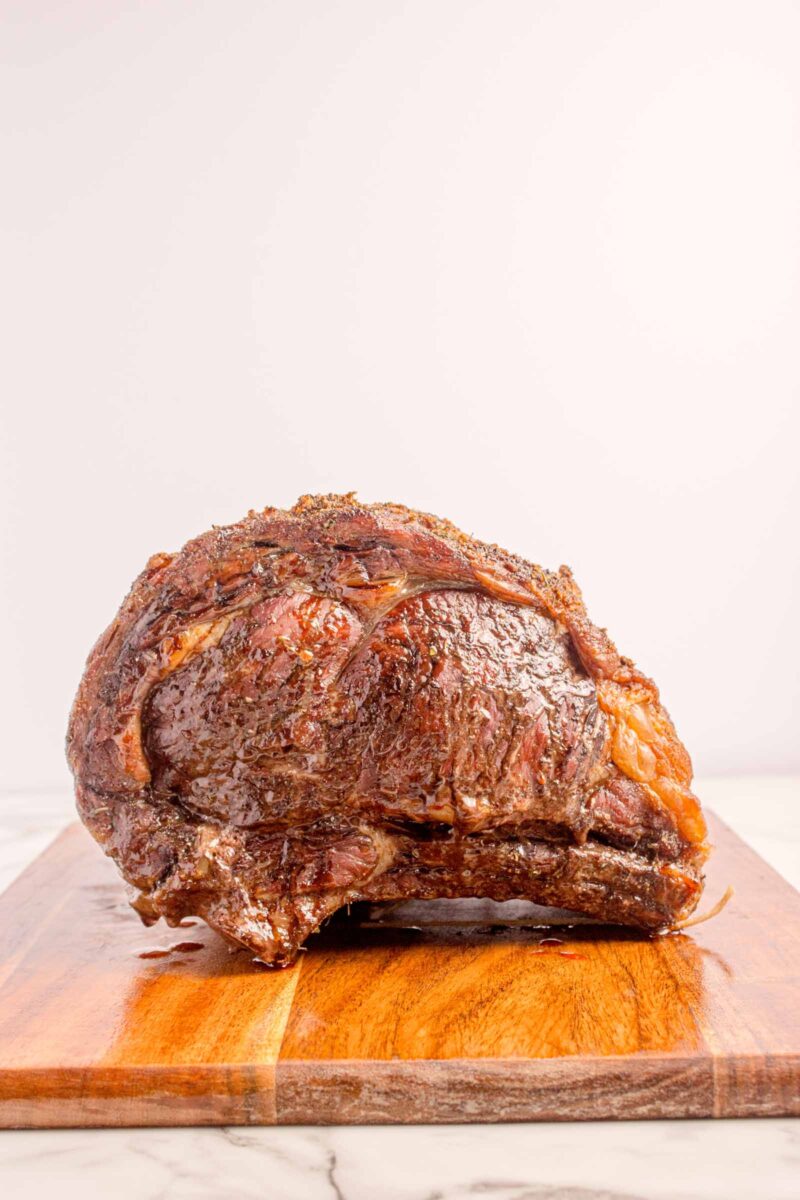
Remove the bones after resting
- Cut the twine and lift the bone rack away from the roast. Because the bones were detached before cooking, they should separate cleanly with no effort.

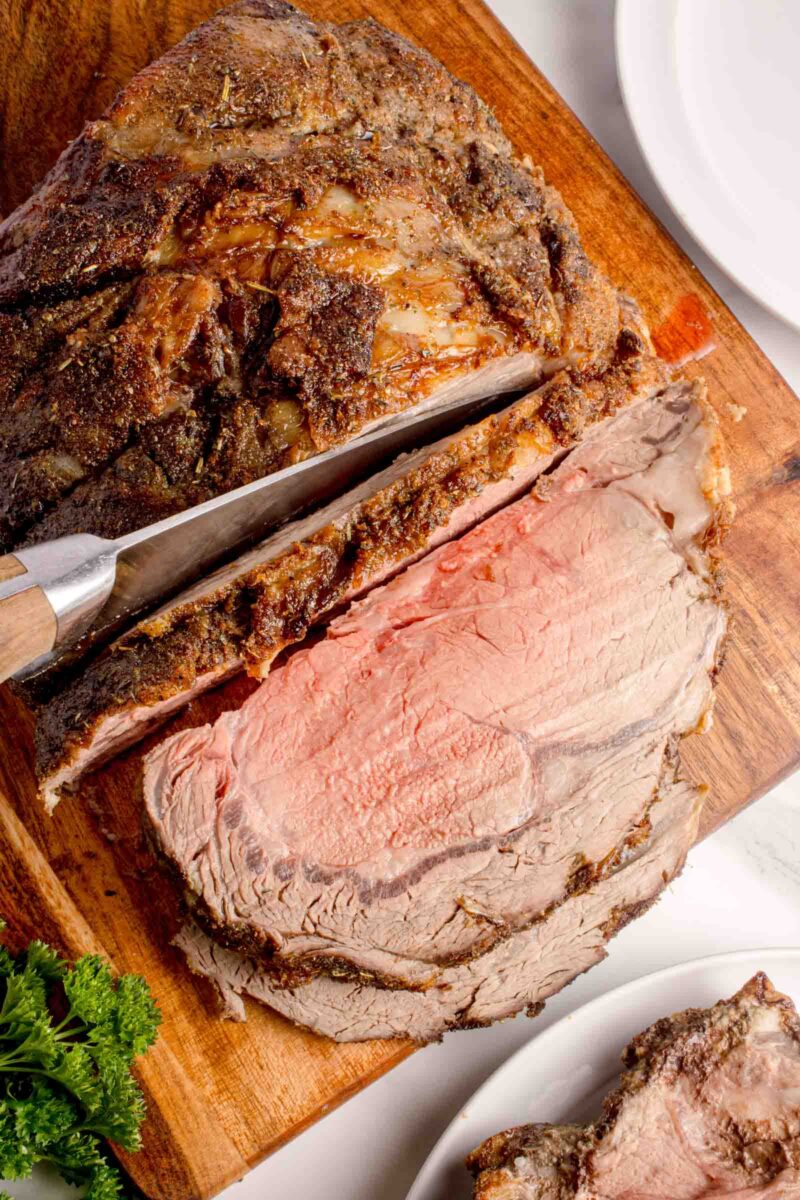
Slice the roast across the grain
- Place the roast fat-side up on a cutting board.
- Trim a thin slice off the end to expose the center, then cut clean ½–¾-inch slices across the grain using long, smooth strokes.
Notes
- Removing the bones before roasting makes all the difference.
This gives you the flavor of a bone-in roast, but the carving ease of a boneless one. It’s the single best move you can make for cleaner slices. - Don’t cut deep when scoring the fat.
You want shallow cuts through the fat cap only. Going into the meat can cause juices to escape and the top to brown unevenly. - Tie snug, not tight.
Over-tightening the twine can make the roast bulge or cook unevenly. The goal is simply to hold the shape together. - Use a thermometer, not guesswork.
Prime rib is too expensive to gamble with. Check the thickest part, away from the bone, so you hit your exact doneness. - Plan for carryover cooking.
A roast this size keeps climbing in temperature off the heat. Pull it 5–10°F below your target and let it rest. - Resting is not optional.
This is where the magic happens. Resting keeps the roast juicy and prevents all those flavorful juices from flooding your board. - Slice across the grain every time.
It’s the difference between tender and chewy. If you’re unsure, slice a small corner first — the grain direction will be obvious. - Save the bones.
They’re packed with flavor and make incredible broth or a quick broil/air-fry snack for the cook. - Use long, smooth strokes when carving.
Sawing tears the meat. Let the knife do the work — a sharp chef’s knife will glide right through. - Trim a thin slice first to expose the center.
This gives you a flat surface, makes the roast easier to stabilize, and ensures every following slice looks perfect.